October was Emergency Preparedness Month. It was a reminder that we can be caught off guard at any moment and that negative consequences of the unexpected can be greatly reduced if we take advance action to prevent the worst from happening.
Our most recent emergency was the covid-19 pandemic. As we rebuild after that event, it is important to consider what we learned and to apply that knowledge to avoid further devasting outcomes. What we learned during the covid-19 pandemic is that individuals with chronic diseases like type 2 diabetes were at far greater risk of severe illness and death.
November is Diabetes Awareness Month. Type 2 Diabetes is occurring with far more frequency than earthquakes or hurricanes. We know what we need to do to prepare for and prevent its onset but we are not taking action in time to prevent it. We can screen for both type 2 diabetes and prediabetes. If we identify the condition at the prediabetes stage, there is much a person can do to reduce the likelihood of developing type 2 diabetes.
A simple blood test conducted by your medical provider is all that is needed. An A1C between 5.7 and 6.4 indicates a person is prediabetic. It is at this stage the condition is considered reversible. This blood test is part of an annual exam or well check. We owe it to ourselves and our loved ones to go in for those yearly checkups. Just like we take our cars in to have the oil changed, tires rotated and balanced, we need to have the same level of care and concern to keep our bodies in good working order. It’s preventive maintenance and it saves us a lot of money and frustration down the road. Just like avoiding maintenance of our car or home, the minor inconvenience of a doctor’s visit is minimal compared to the costs of delayed maintenance.
If we discover we are in that prediabetes range, the course of action is simple but not always easy. Monitoring lifestyle habits like sleep, water intake, nutrition, and physical activity and making small changes (or perhaps large changes) will significantly reduce risk for developing type 2 diabetes. These changes will also reduce risk for heart disease, stroke and cancer. Most importantly, making these changes improves our mood, energy and overall quality of life. Once we begin feeling better, we become more motivated to stick with our new habits.
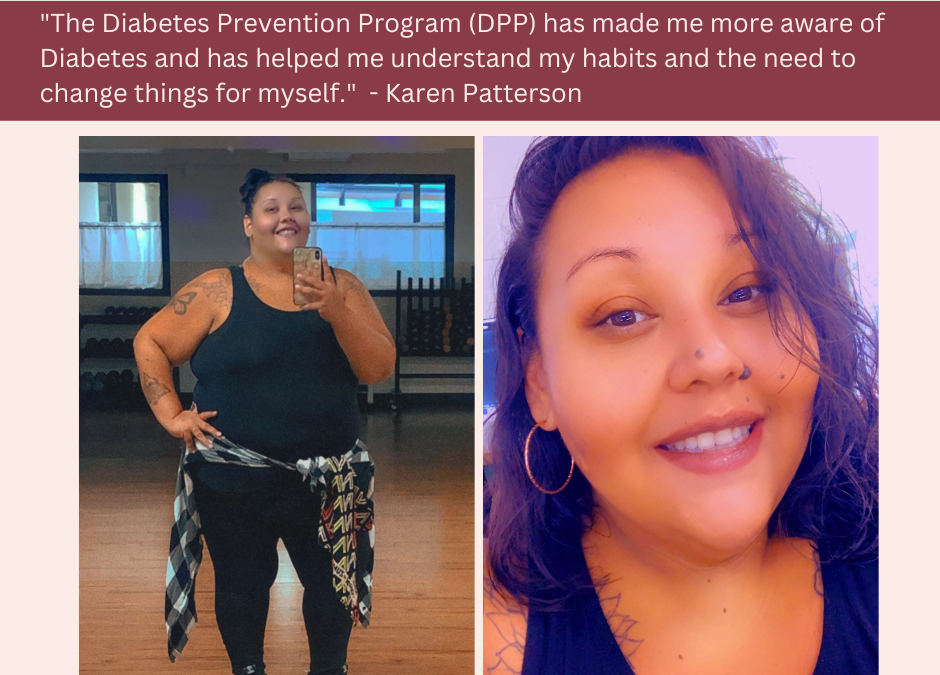
Read below a recent interview with Karen Patterson who is currently taking National DPP, she tells us how she lost 50 pounds in the first 16 weeks!
Karen Patterson, 36 years old, two daughters, lived in PNW her whole life, moved to the Oregon Coast last year and is getting started on a health and wellness journey. These are her thoughts on our program.
“The Diabetes Prevention Program (DPP) has made me more aware of Diabetes and has helped me understand my habits and the need to change things for myself.” “I liked learning from everybody else that was pre-diabetic in class. I thought it was a good way of getting to know people in your community. Everybody struggles, and on the days where I felt like I was struggling the most, and felt bad about it, I didn’t feel alone because it wasn’t just me in class (DPP). I loved getting to know everyone!” “I loved meeting week after week, and the material was great. The fitness bands and the calorie book were fun things to get out of class. I would definitely recommend this class (DPP) because I think it is a step in getting to know what could be in your future if you are somebody who is pre-diabetic. I think it’s great for anyone to have the opportunity to do it (DPP). I like working out now, and I like eating healthier. It was a great class, I loved it!”
If making these changes feels overwhelming, consider joining the National Diabetes Prevention Program at the YMCA. If you’d like more information contact Kelly Benson at 503-842-9622 ext. 111 or kbenson@tillamookymca.org.
On this Hallow’s Eve, whether your night has many frights and spooky lights in store or will be filled with the warm glow of Jack-o’-lanterns as you answer the door to your festive visitors, we combined tips from the CDC and Dana Zia, the Tillamook County Pioneer’s food writer, to help provide you with some tricks in your trick or treat tonight.
Treats:
Not all treats are created equal; there may be a considerable amount of sugar in the treats your goblins or ghosts (and even yourself) consume. Dana Zia shared with us that an estimated 2 billion dollars is spent on Halloween candy each year. For context she adds, “that is enough for 20,000 students to attend a decent college for 4 years, or to feed 303,030 kids in Ghana, Africa for a year!” Eating a nutritious meal, drinking plenty of water (bring water with you) and enjoying the candy in moderation is a way to offset the anticipated sugar load. It is also important to inspect the candy’s packaging before eating, and only eat factory-wrapped treats. If you have any doubt about the safety of a treat, throw it out.
Halloween can be extra tricky for trick-or-treaters with food allergies. Just as with inspecting the candy before eating, if you have an allergy, always read the label on the treat, and throw it out if the label is missing. If an epinephrine auto-injector is prescribed to you or your spooky trick or treater, it is a good idea to carry it with you. If you see “teal pumpkins” with a trick-or-treater, this is a good indication that that superhero or princess has a food allergy. The Teal Pumpkin project was started by Food Allergy Research and Education (FARE) to start a worldwide movement to make Halloween more inclusive and safer for all by providing non-food treats, such as stickers, school supplies, and small toys, to kids with allergies, who can be more easily identified by carrying “teal pumpkins.”
Tricks:
The CDC shares the frightening fact that children, on average, are 2x more likely to be hit by a car and killed on Halloween than on any other day of the year. It is important to be prepared with safety in mind and keep these tricks up your sleeve before going out on Hallow’s eve.
Make yourself more visible to traffic by adding reflective tape to costumes and candy bags and by carrying a flashlight (check the batteries before heading out!). Trick-or-treating is safer in a group, with at least one responsible adult. Stick to the sidewalks when possible, walk, do not run between houses, and stay on the far edge of the road on the side that is facing traffic if walking on the road cannot be avoided. ALWAYS look both ways before crossing the street at a crosswalk or intersection. It is a good idea for each member who is trick or treating to carry emergency contact information in case lost or separated from caretakers or group.
We wish you all safe and happy hauntings tonight. For more information on Halloween safety from the CDC please visit CDC.org and search for “Halloween safety.” For more wellness information, visit our website at https://tillamookcountywellness.org/ and follow Tillamook County Wellness on social media.
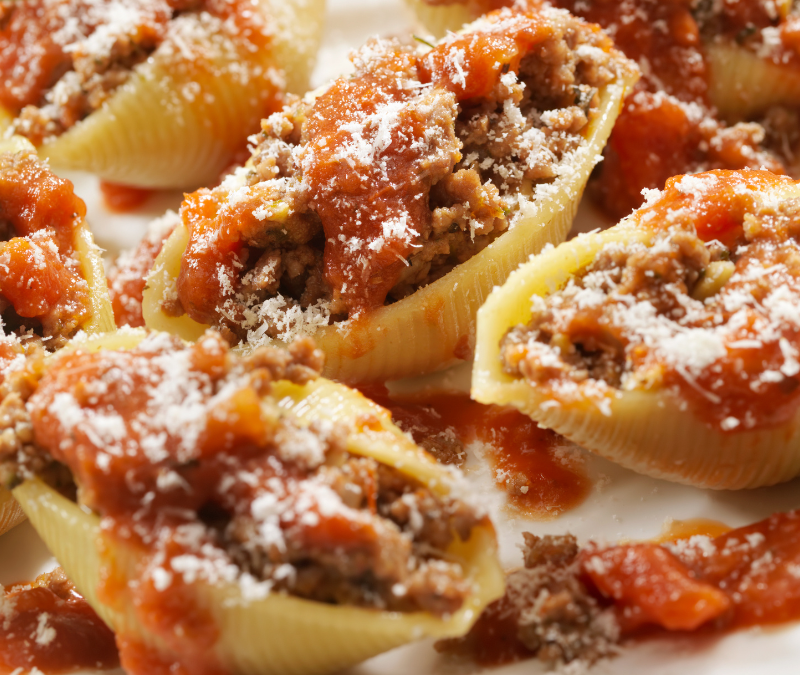
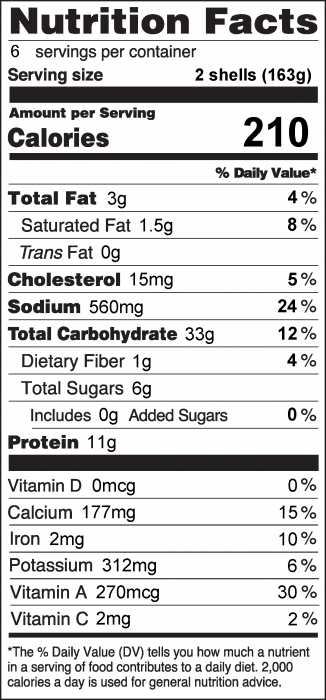
A rich, creamy recipe that combines delicious fall flavors with satisfying pasta.
Ingredients:
12 jumbo pasta shells (about 6 ounces)
1 ¼ cups nonfat ricotta cheese
¾ cup pumpkin
½ teaspoon garlic powder or 2 cloves garlic, minced
2 Tablespoons basil
¼ teaspoon sage
½ teaspoon salt
½ teaspoon pepper
½ cup grated parmesan cheese, divided
1 cup pasta sauce
Directions:
Wash hands with soap and water.
Preheat oven to 350 degrees F.
Cook pasta shells according to package directions. Drain and place each on a baking sheet to cool.
In a medium bowl, stir together ricotta, pumpkin, spices and all but 1 Tablespoon of the cheese. Reserve the 1 Tablespoon cheese for topping.
Spread pasta sauce in the bottom of a baking dish that holds all the shells in a single layer. Fill each shell with about 3 Tablespoons of pumpkin mixture and place shells close together on top of the sauce.
Cover pan with foil and bake for 30 minutes. Remove foil, sprinkle with remaining cheese and bake for 15 minutes more.
Refrigerate leftovers within 2 hours.
Notes:
Freeze unused pumpkin and add to soup, chili or pancake recipes.
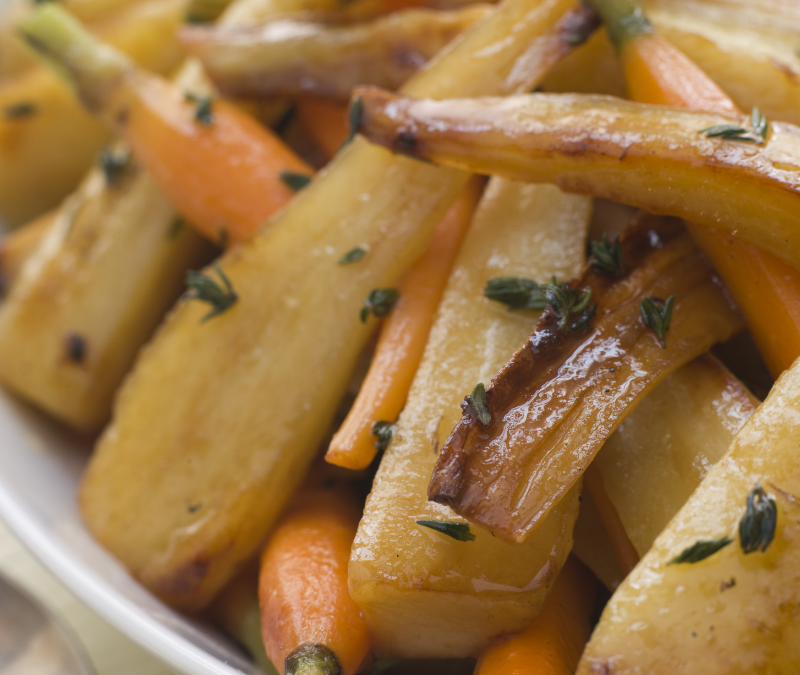
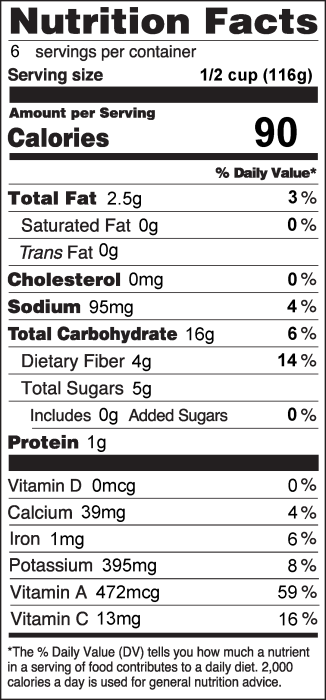
Perfectly Paired: Roasted Parsnips and Carrots as Your Ideal Autumn Comfort Side. Roasting these root vegetables brings out their delightful blend of sweet, smoky, and nutty flavors, making them the ultimate accompaniment for a cozy, rainy fall day.
Ingredients:
¾ pound parsnips, peeled if needed
¾ pound carrots, peeled
1 Tablespoon vegetable oil
⅛ teaspoon salt
⅛ teaspoon garlic powder
⅛ teaspoon pepper
Directions:
1. Preheat oven to 400 degrees F.
2. Cut the parsnips and carrots into uniform pieces such as 3 x ½-inch sticks or 1-inch thick slices.
3. Place cut parsnips and carrots into a large bowl. Add the vegetable oil and stir to coat the carrots and parsnips.
4. Add the salt, garlic powder and black pepper and stir until the vegetables are well coated with seasonings.
5. Place vegetables in a single layer on large baking sheet being careful not to overcrowd the pan. Lining the baking sheet with foil or baking parchment will help with clean-up.
6. Roast in the preheated oven for 20 to 30 minutes, stirring the vegetables half way through the time. The carrots and parsnips should be caramelized to a medium brown and blistered.
7. Refrigerate leftovers within 2 hours.
Notes:
Try adding other seasonings such as thyme or onion powder.
In this weeks blog we would like to quote some great references from: Better Health Channel about Healthy School Lunches; https://www.betterhealth.vic.gov.au/health/healthyliving/healthy-eating-school-lunches
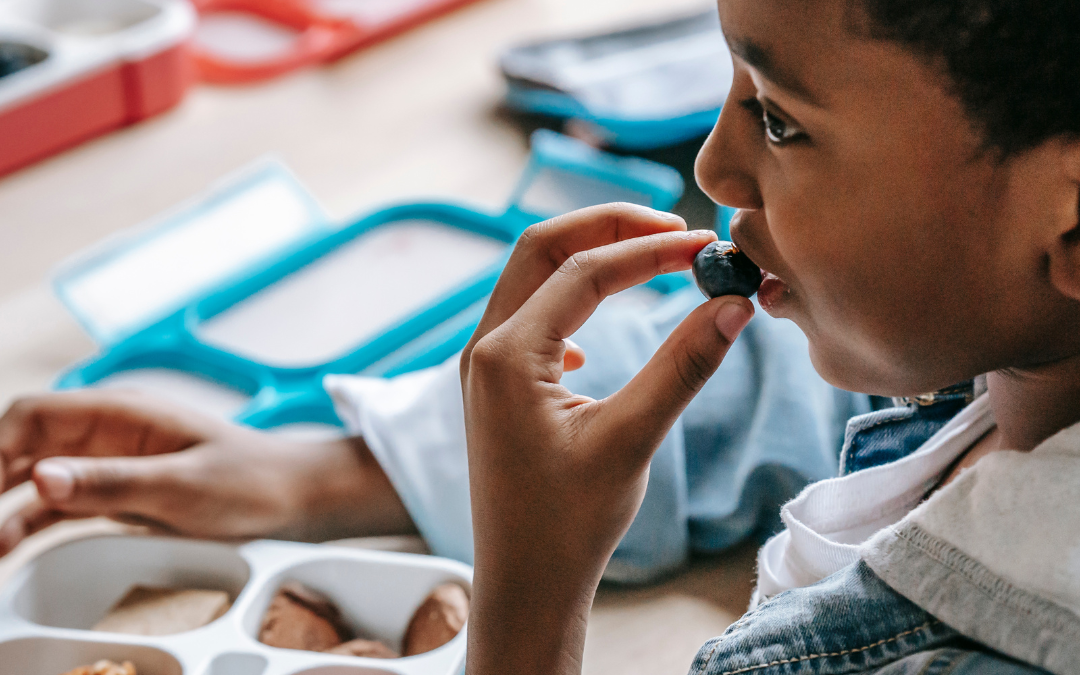
“School is a time when children start to make independent choices about their lifestyles. School aged children learn quickly and are influenced by friends and popular trends. This is an important time to talk about and encourage healthy food habits.
Involving children in planning and preparing their own lunchboxes gives them the opportunity to learn about healthy eating, and also gives them a chance to make autonomous decisions about what they will be eating during the day.
Involve your Children in Healthy Choices
Tips to help get your kids involved include:
Talk to your children about what they would like to have in their lunchbox. Discuss healthier food and drink choices and decide what will be in the lunchbox together.
Write a shopping list together. Take your children shopping with you and let them choose foods and drinks from the shopping list.
Encourage your children help prepare their lunchboxes. Older children may be able to prepare most of their lunch themselves, and younger children can help with making sandwiches or cutting up soft fruit. It is a good idea to prepare lunchboxes the evening before to allow children to participate.
What to Put in Healthier School Lunches
The six key parts to a healthy lunchbox include:
Fruit – best choices include fresh or tinned fruit. Dried fruit is sticky and high in sugar, so have it occasionally.
Vegetables – try fresh crunchy vegetable sticks with dip or a small container with mixed vegetables such as cherry tomatoes, carrot sticks, and cucumber.
Milk, yogurt or cheese – you can use reduced-fat options for children over the age of 2 years. For children who cannot tolerate milk products, offer appropriate daily alternatives like calcium fortified soy or rice drink or soy yogurt.
Meat or meat alternative foods – try lean meat (like chicken strips), a hard-boiled egg or peanut butter. If your school has a nut-free policy, peanut butter and other nuts should not be included in your child’s lunchbox.
Grain or cereal foods – like a bread roll, flat bread, fruit bread or some crackers (wholegrain or whole meal options).
Drinks – tap water is best
Tips for Healthy Lunchboxes
Cut up large pieces of fruit and put them in a container – this makes it easier to eat, especially if your child has wobbly teeth or if they have less time to eat than they are used to. Send a damp face washer to help with extra juicy fruit.
Consider giving half a sandwich or roll for morning recess, as this is an easy way to get a healthy fill.
In the hot weather, send frozen milk, yogurt or water, or even frozen orange segments. This makes a great refreshing snack and helps to keep the lunch box cool.
Go for color and crunch in the lunch box by offering a variety of colorful vegetables and fruit.”
In conclusion, the choices we make for our children’s lunchboxes can have a significant impact on their overall health and well-being. By prioritizing fresh fruits and vegetables, lean proteins, and whole grains, we set them up for success both in and out of the classroom. Remember to involve your children in the decision-making process, as this not only educates them about healthy eating but also empowers them to make smart food choices on their own.
As parents, guardians, or caregivers, our role in shaping their dietary habits is instrumental.. So, as you pack those lunchboxes, think about the nutritious and delicious options that can fuel your child’s day and set them on a path to a lifetime of healthy eating.
Here’s to happy and healthy lunchtimes for our little ones!
Resources:
Better Health Channel. (n.d.). Healthy Eating – School Lunches. Retrieved from https://www.betterhealth.vic.gov.au/health/healthyliving/healthy-eating-school-lunches
National Health and Medical Research Council, Australian Dietary Guidelines, Australian Government.
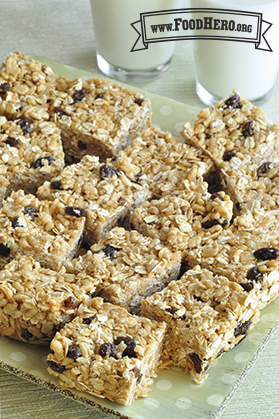
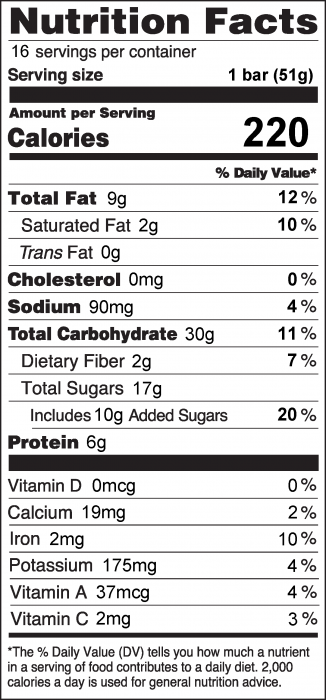
Looking for a kid-friendly, nutritious snack that’s perfect for when you’re on the move? Give these Peanut Butter Cereal Bars a try! Whole grain oats, peanut butter, and dried fruit make a crispy, chewy treat.
Ingredients
½ cup honey (see Notes)
1 cup peanut butter
2 cups rice cereal
2 cups quick-cooking oats
1 cup raisins or other dried fruit
Directions
Wash hands with soap and water.
In a saucepan, bring honey to a boil.
Reduce heat to low and stir in peanut butter.
Add cereal, oats and raisins; mix well. Remove from heat.
Lightly grease an 8×8-inch baking pan. Press mixture into pan. When cool, cut into 16 bars.
Store in an airtight container for up to a week.
Notes
Try this recipe with 4 cups of unsweetened cereal flakes instead of the rice cereal and oats.
Honey is not recommended for children under 1 year old.
To avoid peanuts or peanut butter, try sunflower seeds or sunflower seed butter.
Photo and recipe credit: https://foodhero.org/recipes/peanut-butter-cereal-bars