by Michelle | Jan 16, 2024 | Eat Well, Featured, Move Well, Work Well
Tillamook County Wellness was launched in 2016 as a “Year of Wellness” with a simple goal – to encourage people to make small changes to become healthier. After a successful kick-off year, the Wellness Advisory Committee decided to ride the wave of community support for this grassroots population health improvement initiative and set a ten-year goal to reduce the percentage of people in Tillamook County who were at risk for developing Type 2 Diabetes. This ambitious goal had one significant challenge. How would we track our efforts to determine if we were having an impact? We can’t measure what doesn’t happen. Or can we?
In 2016, the percentage of adults in Tillamook County living with a diagnosis of diabetes was 12%. In 2023, the same source for this data (County Health Rankings), reported Tillamook County rates at 8%. Another bright spot for comparison is that we began our journey with a health ranking in the bottom third of Oregon counties. Today we boast a #12 county health ranking status out of 35 ranked counties in the state. Anecdotally, we are making progress. More concretely, we have built more trusting relationships, established policies, programs and strengthened partnerships in ways that are making Tillamook County a healthier place to live, work, play, learn and age.
So, who is Tillamook County Wellness and what exactly are we doing to improve health and quality of life in Tillamook County? It’s all of us and it’s everything. This is what collective action looks like. It takes everyone thinking, working and living together intentionally in ways that promote health and well-being.
In 2023, 34 community and government organizations, businesses, schools, healthcare partners and many, many volunteers all worked together to move the dial on health. Grants were written and awarded for building a sustainable healthcare partner network, implementing a health literacy campaign and partnering to hold a bike rodeo where more than 30 bikes were given away to area families. Walking groups, led by volunteers, met weekly throughout the county. Hundreds of vegetable seeds were distributed so our local gardens can “Grow Well.” Free wellness classes were held in English & Spanish for everything from how to prevent and manage chronic diseases like type 2 diabetes to how to manage personal finances.
Upstream efforts to build more housing, increase the availability and affordability of childcare and expand education pathways for higher income-earning potential are just some examples of how partners are working to create the conditions for a healthier community. Changes to the built environment such as community walking paths, segments of the Salmonberry Trail and a bike pump track are other examples of work being done to make it easier for people to get and stay healthy. Area schools work with Food Roots to teach kids where their food comes from and how to cultivate and cook it. Nutritious recipes with easy-to-find, inexpensive ingredients are being shared and devoured based on the social media stats behind those shares.
The point here is that wellness is more than a number on the scale or a medical record. Wellness starts with people’s ability to have a safe place to live, healthy food to eat, an education that leads to a living wage job, a community that has adequate supports for mental health, addiction, and for families with loved ones experiencing disabilities or different abilities.
Often, when we think about the challenges that negatively impact community health, we wonder, “why isn’t someone doing something about this?” Working in community well-being for a decade, it is clear to me that much is being done and a lot of positive changes are resulting from those efforts. The organizations responsible for much of this work are often constrained by lack of funding, staff or volunteers. You can make a difference by making donations to your favorite charities, getting involved as a volunteer, and advocating for the good work within your family and peer circles. After all, giving back is good for your health.
Written By Michelle Jenck, M.Ed.,
To learn more, get involved and donate, visit www.tillamookcountywellness.org or email us at info@tillamookcountywellness.org.
by Guest | Dec 5, 2023 | Eat Well, Featured, Lunch & Snack Recipes, Recipes, Uncategorized
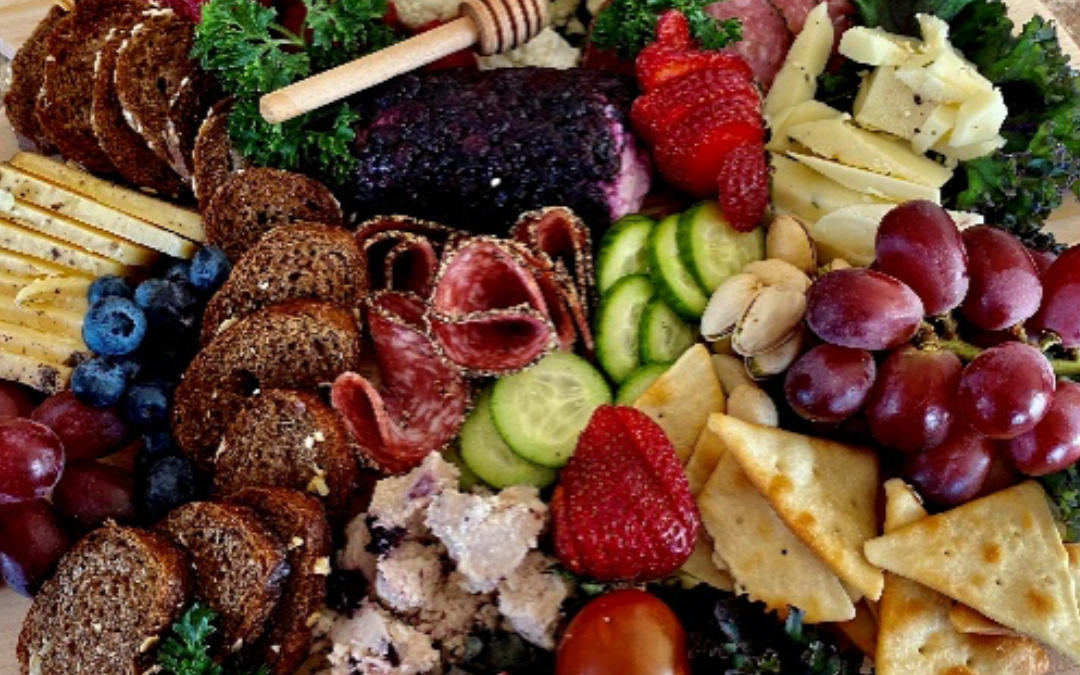
Here’s a beginner’s guide to help you create an appealing charcuterie board for your upcoming event.
- Plan for the board size according to your group. It’s better to overshoot on size than to run out of room
- Place the cheeses in strategic spots. If you pull them out of the refrigerator an hour or so ahead of time the room temperature makes for better flavor. They can be used to prop up any potentially rolling items like berries
- Add any small decorative bowls (dips, olives, anything you’d like the flavor to stay contained)
- If you are going to add any meat you will want to curve or curl them
- Arrange crackers and condiments
- Fill in all the gaps with fruit and veggies
- Add nuts and/or chocolate.
- Add garnish!
Harvest Charcuterie
- 1 8-ounce wheel of brie
- 4 ounces Manchego cheese, sliced into ¼ inch triangles
- 5 ounces cheddar cheese, sliced into ¼ inch pieces
- 1 cup seedy crackers
- 8 dried breadsticks (halved if necessary, to fit on board)
- 2 cups black grapes
- 3 figs, halved
- 1 cup berries (blackberries, raspberries, and blueberries)
- ½ cup olives
- ¼ cup gherkins
- ¼ cup dried ginger pieces
- 1 tablespoon pepitas
- 1 tablespoon dried cranberries
- Garnish with rosemary, basil, or any leafy lettuce
Charcuterie is an art medium and you are the artist.
Enjoy!
Artist/Author: Christine Webber
Other wellness questions? Email us at info@tillamookcountywellness.org. For more local health and wellness information, visit www.tillamookcountywellness.org or follow Tillamook County Wellness on Facebook and Instagram.
# # #
by Guest | Nov 21, 2023 | Eat Well, Featured, Recipes, Uncategorized
Scalloped Spiced Sweet Potatoes & Apples with walnuts & cranberries, Potato & Green Chile Stew, White Bean & Spinach Antipasto and Damper Bread are all delicious easy holiday (or any day) recipes to serve every diner at your holiday table. All are visually appealing for a beautiful spread, comforting and nutritious. With the addition of meat dish or dessert, these recipes might happily serve as the entire holiday lunch or dinner menu for most diets.
Spiced Scalloped Sweet Potatoes & Apples with Walnuts & Cranberries (Gluten free and vegan or vegetarian)
People seem forever looking for a better sweet potato or yam recipe; something simple and wholesome (sans marshmallows – please) yet lovely to look at and even better if it’s filled with both nutrition and flavor. This original recipe takes about 10 minutes to prep and bakes without any checking and fussing. It makes an attractive (inexpensive) presentation for a special occasion, and you’ll be delighted with the simplicity and the taste.
- 1 Tablespoon salted butter or vegan margarine, for baking pan
- 2 or 3 medium Oregon garnet yams or sweet potatoes, peeled and sliced in ½ inch thick slices
- 3 or 4 large Oregon apples (two types if possible: (Fuji, Pink Lady, Golden Delicious), cored, partly peeled (in strips) and sliced in ¾ inch thick slices
- ¾ cup walnut chunks
- ½ cup raw Oregon cranberries – unsweetened (fresh or frozen)
- ¼ cup salted butter OR vegan margarine, melted
- ⅓ cup real maple syrup* OR honey *can be substituted for a sugar-free variety
- ½ teaspoon ground cinnamon
- ½ teaspoon freshly ground black pepper
- ¼ teaspoon salt
- ¼ teaspoon nutmeg, freshly grated
- ¼ teaspoon ground cardamom OR ground coriander
Generously grease a 9” x 13” oven safe glass or ceramic baking pan with butter or vegan margarine. Preheat oven to 375º F. Place oven rack in center position
Alternate yam and apple slices (scallop) decoratively, in rows, in prepared baking pan
Sprinkle walnuts and cranberries over yams and apples:
In the saucepan melt the butter, combine the butter with maple syrup (or honey) cinnamon, black pepper, salt, nutmeg, and cardamom (or coriander). Pour syrup or honey mixture evenly over all in the baking dish.
Bake, covered with foil, at 375 F. for around 35 – 45 minutes. Remove from oven; uncover and serve. This is healthy, colorful, and almost like eating dessert. A good side dish with poultry, pork, bean and rice herb pilaf or stuffed winter squash. Serves 4. Easily doubled.
DUTCH OVEN DAMPER BREAD (vegetarian or vegan)
Damper Bread is a vintage WW 2 rationing recipe from Australia. Many ingredients were hard to find and had to be purchased with stamps from food ration books. Items like sugar, butter and eggs could cost lots of stamps, so recipes had to be adapted to suit the needed thrift and distribution problems of the time. Notably baked over a campfire by Aussie swagmen, home cooks have learned to love its simplicity and good taste. Typically cooked in a Dutch oven or wrapped in foil over a campfire, this easy oven recipe is a nice fluffy but rustic quick bread for the holiday table. Looks nice too.
- 4 cups All-purpose Flour
- 2 teaspoons Baking Powder
- 1 teaspoon Baking Soda
- ½ teaspoon Salt
- 3 tablespoons Salted butter or margarine chilled and cut in cubes
- 1 1/2 cups buttermilk OR unflavored unsweetened plant-based milk, soured with vinegar*
Combine flour, baking powder, baking soda and salt in a bowl.
Add cubed and chilled salted butter or margarine
Using your fingers, crumble the fat into the fat until the fat is barely visible.
Pour cold buttermilk in the middle of the flour mixture and stir until combined. Using your hands, combine it together into a sticky ball.
Lightly knead the dough on a floured surface just to form it into a round dough ball.
Heat the oven to 425° F.
Transfer dough to a lightly oiled Dutch oven.
Cut across on the top surface – halfway through into 8 wedges of dough. Don’t cut all the way through.
Close lid on Dutch oven and bake in the preheated oven for about 30 to 35 minutes.
Check if the bread is done just by tapping it on the top or bottom with your fingers. It will sound hollow when it’s done.
8 servings
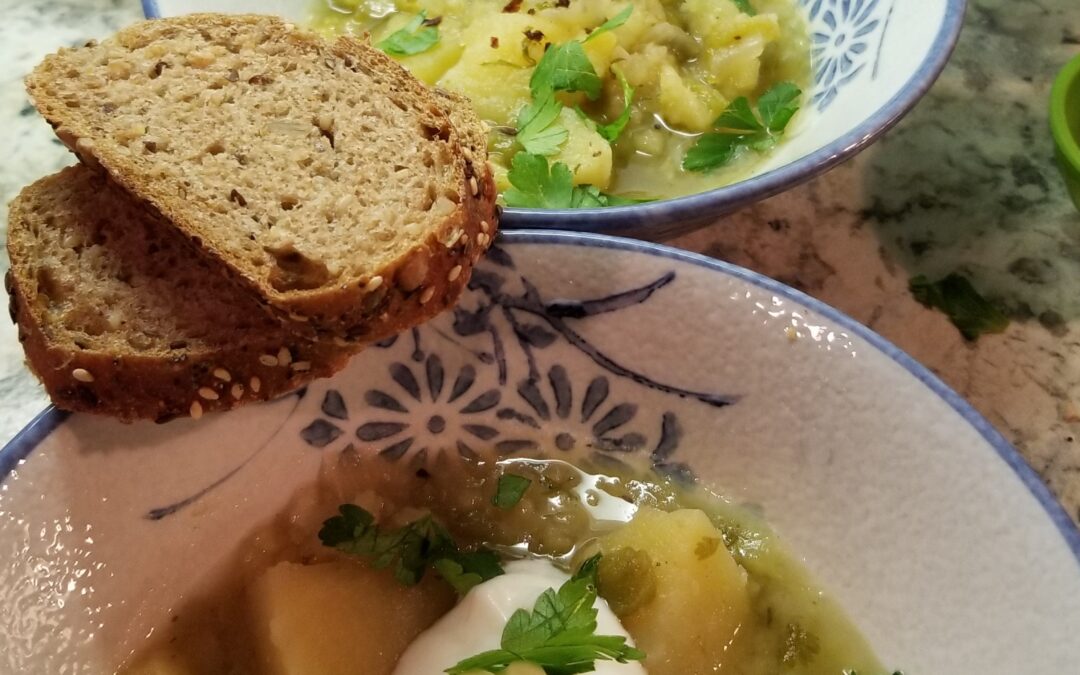
POTATO & GREEN CHILE STEW (vegetarian or vegan, gluten free)
Economical, quick and satisfying, this stew, adapted from the recipe by Deborah Madison is perfect the day it’s made and even better the next day. Eat with a dollop of sour cream or plain Greek yogurt on top or prepare with water (instead of chicken broth), pass on the sour cream, and this is a satisfying and comforting vegan meal sprinkled with some shelled, roasted pumpkin seeds (pepitas).
- 2 Tablespoons vegetable oil
- 1 medium large onion, diced
- 2 – 7-ounce cans mild fire roasted diced green chilies
- 1 teaspoon ground coriander
- ½ teaspoon ground cumin
- 2-3 medium garlic cloves, minced
- 2 large russet potatoes or 1½ – 2 pounds smaller potatoes, peeled and chopped into 2-inch chunks
- ¾ -1 teaspoon salt
- ¼ teaspoon pepper
- 2-3 cups chicken broth OR water
- Sour cream OR plain Greek yogurt to finish, optional
- Chopped fresh cilantro OR parsley, optional
Heat the oil in a wide pot or Dutch oven. Add the onion and cook over medium-low heat, stirring frequently until softened, about 5 minutes. Add the diced chilies, coriander, cumin, garlic and potatoes along with salt and pepper; stir. Cook together for 3 minutes.
Add the broth or water. Bring to a boil, and then lower heat to a gentle but constant simmer. Cover and cook until the potatoes are completely soft, about 25 minutes.
Taste for seasoning. If desired, mash some of the potatoes to give the dish a creamy background texture.
Pour stew into bowls; add a dollop of sour cream, and the chopped cilantro, if using.
Serves 4
Adapted from original: Deborah Madison/Food 52
WHITE BEAN & SPINACH ANTIPASTO (vegan, gluten free)
This quick well-balanced recipe, is holiday impressive and uses freezer and pantry ingredients along with a few fresh staples. Not only is it budget friendly but takes just minutes to prepare and is a quick flavorful and light meal for warmer days and a colorful side or starter for holiday tables. Serve it alongside crusty bread, garlic toast or warm rolls. This can be easily doubled.
- 1 – 10-ounce package frozen leaf spinach
- 1 – 15 ounce can great northern beans OR other white beans drained and rinsed
- 1 cup red bell pepper, finely diced
- 1 clove fresh garlic, grated or finely chopped
- 2 Tablespoons snipped fresh chives OR finely chopped tops of green onions
- ¼ cup extra virgin olive oil
- ¼ cup fresh lemon juice
- Salt and freshly ground black pepper to taste
Follow the package directions on the frozen spinach; don’t overcook. Drain, squeeze dry, and finely chop. In a bowl combine the spinach with the beans, bell pepper, garlic, chives, oil, lemon juice, salt, and pepper. Serve chilled, with crusty bread or rolls or garlic toast.
Serves 6 as appetizer, 3 as an entrée.
By: By Kitchen Maven, Judi Berman-Yamada, https://www.facebook.com/Creativepenandpantry/
Many recipes in my posts are found in my cookbook, “Thrifty Comfort Cooking for Challenging Times”. The book is available through Amazon.com and Barnes & Noble.com. All (100%) of author royalties from retail sales of my cookbook go directly to the Oregon Food Bank, Tillamook Services, to assist families and individuals experiencing food insecurity.
Gift giving time is just around the corner. Purchasing this pantry friendly cookbook will benefit not only the recipient of the book, but people in need, as well. Living near Tillamook County or even in Portland, you can also purchase the book through Food Roots Farm to Table Marketplace for a sale price below that of following online sellers, and all proceeds will go directly to that non-profit organization. Thank you for your support.
Amazon.com: Thrifty Comfort Cooking for Challenging Times: 9780578310763: Berman-Yamada, Judith, Berman-Yamada, Judith: Books
Thrifty Comfort Cooking for Challenging Times by Judith Berman-Yamada, Paperback | Barnes & Noble® (barnesandnoble.com)
by Guest | Nov 20, 2023 | Being Well, Eat Well, Featured, Recipes, Uncategorized
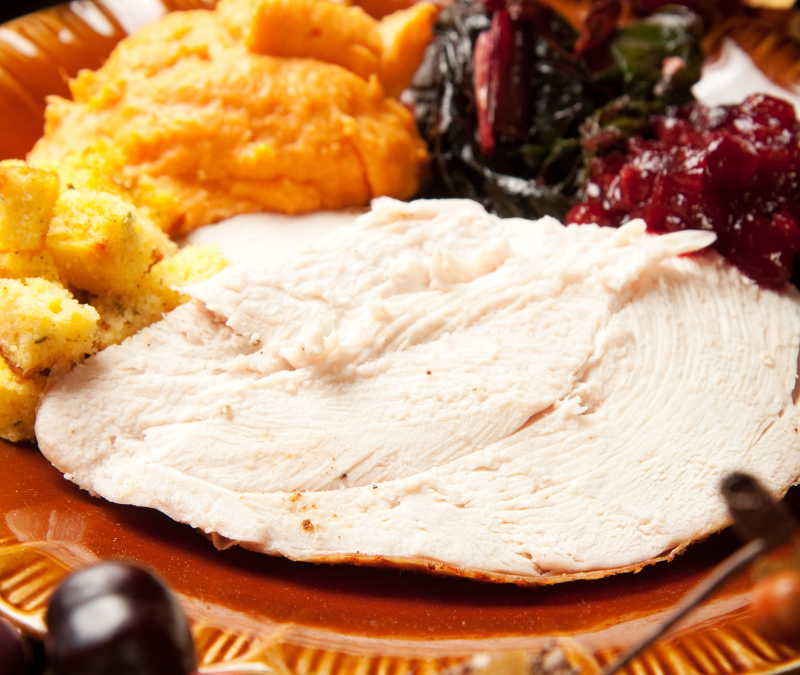
Nearly every one of us will celebrate one or more of the upcoming fall and winter holidays, observances, and celebrations just around the corner. This year why not aim for praiseworthy recipes and meals that are also thrifty and nutritious as well as delicious? You need look no further. Following is a menu for a pretty easy breezy meal all the guests will enjoy. Uncle Morrie won’t need to sit in the corner with salad and applesauce while Cousins Burt and Sheila sift through each dish to avoid anything with meat, your granddaughter can’t have most grains, hubby has an Epi-pen handy in case he accidentally swallows nuts, your sister is diabetic and your old friends, the Carters, are vegan. Yikes! The scenario leaves a lot of guests in a post dinner hunger mode that might well ruin the celebration for them and for you.
Turkey, ham, and brisket are not necessarily meal requirements for every holiday meal, and no one needs marshmallows on yams, cheese and butter in every dish or layer cake for dessert. Exotic fruits and vegetables from other areas of the world might be fun for a holiday meal, but if they’re unseasonal where you live, they’ll be not only more expensive but less nutritional due to their long journey to your table.
- Prepare or at least partially prep recipes up to three days ahead, and even longer for items you can freeze.
- Look for what’s available and least expensive at the grocery store, including cuts of meat and eggs.
- Be aware of what’s plentiful and seasonal where you reside. It will be fresher and less expensive.
- When there are sales at the store on dry goods, stock up. We can always have use for canned beans, tomatoes, tuna, fruit, broth, dry milk, nut butters, corn meal, butter, vegetable oil, dry and canned milk and of course flour and baking supplies.
- If friends or neighbors have a large supply of certain ingredients or prepared foods and you have something they might use, trade. It won’t cost either of you a penny.
- Ask guests to bring a holiday dish, to share, that they enjoy and possibly prefer.
- Know your limitations. Base your menu on availability of your time, your expertise and whether you’ll have a kitchen helper or be the chief cook and bottle washer.
- Don’t overextend yourself or your budget.
- Or be even more creative and make personal pizzas with easy no-yeast yogurt crusts and toppings you have on hand.
- Or host a taco party and ask guests to bring components, they adore, for the taco fiesta. Have gluten free and vegan tortillas available if possible or ask guests to bring their preference.
Whether for Thanksgiving or any other winter meal celebration, the menu options are endless when the chef steps out of the conventional meal box and goes creative. Here are two thrifty menus that provide dietary options for all your guests. One is a quick and easy menu. The second is a menu plan for the ardent chef, on a budget, who wants to present showstoppers. Both menus are delicious and nutritious and varied to feed all the tastes and dietary needs of your guests while fitting into your budget. Mix and match or prepare just two or three of the dishes listed. It’s all about variation and deliciousness based on what works for you and your holiday crowd.
EASY MENU:
Stove Top Popcorn (gf/vegan)
White Bean Hummus with Rice Crackers (vegan, gf)
*Potato & Green Chile Stew
Zesty Barbecue Glazed Roast Turkey Drumsticks
Steamed Fresh or Frozen Broccoli with* Tamari aioli (veg, gf)
OR
Steamed Peas with mint and lemon butter (veg, gf)
Cornbread (gf) with butter/margarine
Homemade Jam
Chocolate Wacky Cake (vegan)
& Fruit Compote Sundaes (gf)
OR
*Chocolate Love Pudding (gf, veg/vegan)
& *Carrot Spice Cookies (vegan)
ARDENT MENU:
Humble Pumpkin Soup (veg/vegan)
*White Bean & Spinach Antipasto (gf, vegan)
*Gardeners’ Seasonal Company Galette (vegan / veg) &
Gardeners’ Seasonal Casserole (vegan / veg, gf)*Scalloped Spiced Yams & Apples with walnuts & cranberries (vegan/ veg, gf)
*Turkey Meatballs Stroganoff
Herbed Rice Pilaf (vegan, gf)
*Damper Bread with butter/margarine
*Oregon Apple Tart a la Jacques (veg/vegan)
& Maple Pumpkin Pie
OR
*Light Lemon Cheesecake Cups (gf)
& Zucchini Tahini Brownies (vegan)
By: By Kitchen Maven, Judi Berman-Yamada, https://www.facebook.com/Creativepenandpantry/
Many Recipes in my posts are found in my cookbook, “Thrifty Comfort Cooking for Challenging Times”. The book is available through Amazon.com and Barnes & Noble.com. All (100%) of author royalties from retail sales of my cookbook go directly to the Oregon Food Bank, Tillamook Services, to assist families and individuals experiencing food insecurity. Purchasing the cookbook will benefit not only the recipient of the cookbook, but people in need, as well. Living near Tillamook County or even in Portland, you can purchase the book through Food Roots Farm to Table Marketplace for a sale price and all proceeds will go directly to that non-profit organization.
Amazon.com: Thrifty Comfort Cooking for Challenging Times: 9780578310763: Berman-Yamada, Judith, Berman-Yamada, Judith: Books
Thrifty Comfort Cooking for Challenging Times by Judith Berman-Yamada, Paperback | Barnes & Noble® (barnesandnoble.com)
