by Guest | Dec 9, 2017 | Eat Well, Recipes
By Debbie Braden-Lane, Branch Operations Specialist, Oregon Food Bank-Tillamook County Service
Some tasty and easy ways to eliminate food waste and save time and money, by utilizing leftovers! Especially during the holidays or after other family get-togethers, or big Sunday dinners.
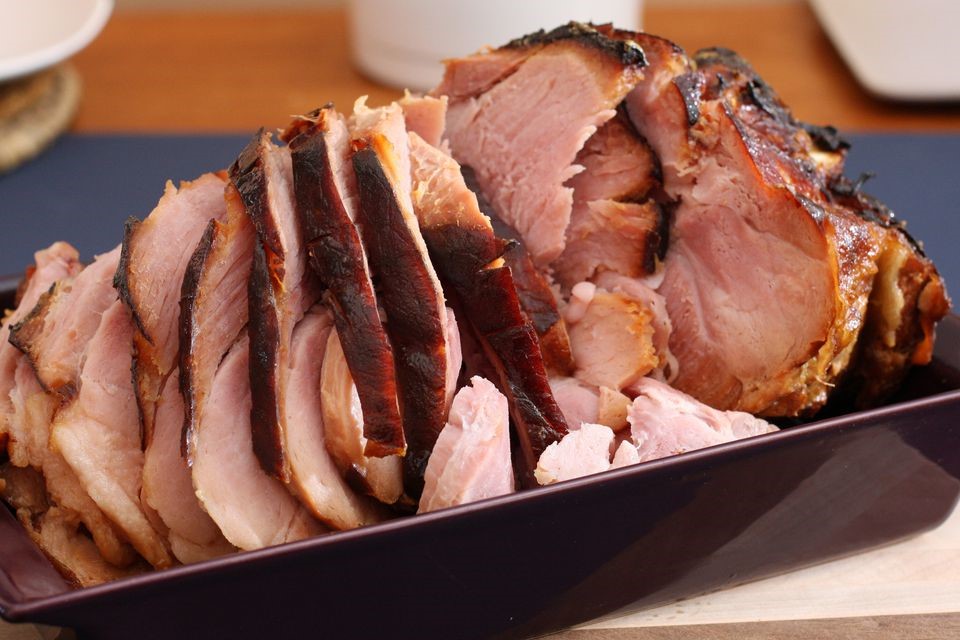
- Sunday: Ham Dinner w/ German Potato Salad, Cooked Carrots and Applesauce
- Monday: Hot Ham and Cheese Sandwiches
- Tuesday: Ham and Bean Soup
- Wednesday: Scalloped Potato and Ham Casserole Dinner
- Thursday: Red Beans and Rice with Diced Ham
- Friday: Homemade Hawaiian Pizza Night!
On Sunday, bake a ham and prepare a German Potato Salad (this week’s YOW recipe, provided by Crystal Hayes), include cooked carrots and applesauce for your sides. (Reserve the ham bone as you will use it later in the week for a meal.)
For Monday make up some delicious hot ham and cheese sandwiches. Lay ham and assorted cheeses on a hoagie roll with mustard, wrap in foil and bake in the oven until the contents are hot and the outside of the rolls are slightly crispy. Yum!! This is delicious with a small garden salad.
For Tuesday evening, pick up a loaf of crusty bread and pair it with Ham and Bean Soup, made from the ham bone, great northern or navy beans, diced or shredded ham, celery, onion and carrots. If you don’t want to do a bread two nights in a row, make another garden salad for a soup and salad night!
Ahhhhhh, we are halfway through the work week! Yay! It’s all downhill from here. So, let’s get going on Wednesday’s supper…. Scalloped Potatoes with Ham Casserole. Total comfort food to help us get through the rest of the week.
You can either set up this meal in the crock pot so it’s ready when you get home from that long day … OR throw it together after work. You will need some of your leftover ham, thinly sliced potatoes, a white sauce and shredded cheese, if desired. Bake in the oven at 350 degrees until potatoes are at the desired tenderness. Serve with peas.
How about something really simple for Thursday night? Red beans and rice with ham. Good stuff right there.
Okay, we are heading into the weekend on a Friday evening. Pizza night! Make a Hawaiian pizza with ham and pineapple and add other toppings. Use your imagination and go wild with veggie toppings!
Note: By mid-week, if you notice that you are going to have excess ham for the rest of the week, this would be the time to figure out how much you will need to freeze and put it in the freezer. Or, if you can handle ham for breakfasts and lunches throughout the week, that is, of course, another way to use up your leftover ham. Also, please be careful seasoning your dishes with salt when using ham, as most of the time, the ham provides PLENTY of salt on its own.
There you have it… a whole work week of meal ideas using leftover Sunday dinner! Bonus – You won’t have to remember to get something out of the freezer every morning for dinner that night. I’m sure I’m not alone here!
ENJOY!

by Guest | Nov 24, 2017 | Eat Well
By Anne Goetze, RDN, LD, FAND, Oregon Dairy and Nutrition Council
At the Tillamook Year of Wellness Eat Well, Be Well workshop in March, more than 70 attendees sought expertise from registered dietitian Judy Barbe. In a recent follow-up with Judy, I asked her what she would most like to remind attendees. Her response was to nudge them toward the 3 goals (related to food, physical activity and environment) they set during the workshop.
“I had a great time in Tillamook last March when we focused on nutrition for the Year of Wellness. I’ve heard from some of the attendees and know they are making strides to live best. For most of us, there is always room for improvement. What you put on your fork, how you use your feet, who you connect with, and how you feed your soul are keystones to better living. This article is a perfect opportunity to check in and see how everyone is doing.”
We can all use a refresh on how to eat well and be well.
With food, activity and your environment, the choices you make now can improve your quality of life to live stronger, healthier and happier. Using the power of goal setting, small investments can make huge returns on improving your health. Start small with an easy change that leads to a bigger change over time. Think about where you are now in your health and well-being. Are you where you want to be? How could you make better food choices, do more physical activity, improve your environment and feed your soul?
Maybe it’s getting up early to walk your dog in the morning before leaving for work, or connecting with family and friends over a home-cooked meal. Perhaps it means slowing down and enjoying a warm latte on a cold morning. What about giving your plate a make-over with choosemyplate.gov? Making sure you get enough food from each food group (dairy, protein, grains, fruits and vegetables), most days, is a winning live best strategy.
We reached out to attendees of the conference to see what changes they have made to live best. Here’s what they have been doing:
“Decreasing sugar, taking stairs, parking farther away from the store.”
“Making smoothies with dairy milk.”
“Taking a break or a short nap.”
“I am making breakfast oatmeal in the rice cooker.”
“I have increased my daily activity. Sitting less. Moving more.”
“Cooking at home more.”
“I planned dinners for the week before grocery shopping.”
“Finished painting the outside of the house… big deal, I’m 73!!”
“Drinking more water intentionally.”
“I have begun doing brief high-intensity-interval workouts.”
Need some ideas or motivation? Get started with or refresh your own Eat Well, Be Well goals at http://www.livebest.info/
Judy created a free, 5-day High Five Fiber Challenge you can join by clicking this link (http://eepurl.com/c3XHxL). You’ll get tips and tools, resources and recipes to create your own roadmap to meet your fiber goals. Don’t ya? Won’t ya? Seriously, it’s only 5 days.

by Guest | Sep 23, 2017 | Eat Well
By Heather White, Community Health Improvement Coordinator, Columbia Pacific Coordinated Care Organization
We all know that nutrition is incredibly important, especially for growing children. But how often do we think past the content of the meals we make our children, and think about the environments we serve those meals in? In all the big things we do for our kids: teaching them how to be a healthy adult, getting them through life’s big milestones and hurdles, and providing them their basic needs, the “little things” actually make a huge impact on who our kids turn out to be.
Research is clear across the board: Family mealtime is important. Having a consistent, supportive family mealtime can drastically reduce a child’s risk of substance use disorders, depression, suicide or suicidal thinking, obesity, and more. They can set our children up to have higher self-esteem and be more successful not only in school, but in their ability to form healthy relationships with family, friends, and colleagues. Not much of the research out there suggests that there’s any tricky magic formula to logistics: it doesn’t seem that it has to take place every night or for a specific length of time, but sitting down away from a TV to eat for 3 or more nights per week can help us build strong and lasting connections within our families. The food, the habits, the place, and more are up to us.
Family mealtimes can come in packages as diverse as our families, but some of the headaches we face may be very similar. Some of us may feel guilty for not having family mealtimes “often enough” because we are busy. Others may dread family meals because we anticipate arguments with our teens, or struggles with our toddlers over how much to eat, or because they remind us of the struggles we had with our families as children. Mealtimes can be a source of joy for you and your family, and can provide opportunities for your child to learn and grow in a safe place.
Charlie Slaughter, MPH, RD writes in his book Hungry for Love: Creating a Mealtime Environment That Builds Connection, Life Skills, and Eating Capabilities writes that it is never too late to try something new. Mr. Slaughter writes about the importance of healthy attachment and how mealtimes can be a great place to start, because mealtimes are about feeding our children (and receiving) four vital things: love, care, connection, and food. He argues that rather than focusing on the food as the most important thing, if we focus on allowing our children to make decisions about how much they eat of what you offer, having meaningful conversations, and giving and receiving love even when we tell each other “no” to foods or to behaviors that many things about parenting outside mealtime can become more joyful as well.
If you’d like to learn more about strategies for healthy mealtimes and other “small things” we can do to help our children grow, Mr. Slaughter will be giving a full day training at Tillamook Bay Community College from 9:30am-4:30pm on October 5th. It is open to parents as well as anyone who works with children. RSVP here: https://cosp_tillamook.eventbrite.com
by Guest | Sep 7, 2017 | Eat Well
By Jessica Linnell, Asst. Professor of Practice, OSU Extension, Family & Community Health
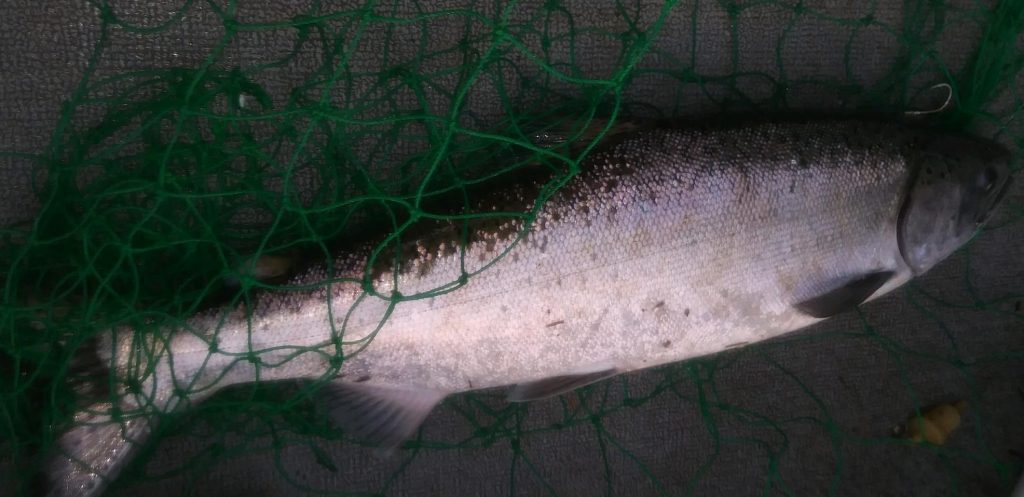
It’s time for fall salmon! If you are planning to catch your own or purchase from your favorite fishmonger, think about canning some to enjoy delicious salmon all year long. Having salmon on-hand can save time in preparing healthy meals. Canned fish is also great protein to have stored in case of emergencies.
Canned salmon can be used in many different dishes and the combinations are endless. Salmon and pasta is a great combination. Add canned salmon to macaroni and cheese. Canned salmon is a great addition to your favorite macaroni salad recipe for a great protein-packed lunch. Canned salmon and pesto sauce make a winning combination.
Canned salmon is also a great protein for salads. Consider making a Caesar salad with romaine lettuce, tossed with a dressing of egg yolks, olive oil, anchovies, and garlic, and then top with canned salmon, croutons and parmesan cheese. Another great way to enjoy canned salmon is in soups and chowder.

If you enjoy canning and would like to teach others, the Oregon State University Extension Office is offering a Master Food Preserver course beginning October 17th. This program trains and certifies adult volunteers in proper food preservation and safe food handling techniques. Course fees are $125 with volunteering, $250 without volunteering. Register at http://bit.ly/TillamookFoodPreservation. For more information call 503-842-3433 or email nancy.kershaw@oregonstate.edu.
The following is a Pacific Northwest Extension Publication recipe that is research-tested to ensure high quality and safety.
Recipe Title: Home-canned salmon
Recipe Source: Pacific Northwest Extension, PNW 194 Canning Seafood
Time for preparation (including preparation and cooking): 100 minutes for processing, plus additional time to catch and filet your fish
Ingredients & equipment
- Raw salmon
- Pressure canner
- Pint or half-pint jars
Directions:
These instructions are for plain, raw fish. To can smoked fish, see PNW 450 Canning Smoked Fish at Home. This recipe is for salmon, trout, and other fish, except tuna.
- Bleed and eviscerate fish immediately after catching (never more than 2 hours after they have been caught.) Chill the cleaned fish immediately and keep on ice until you are ready to can.
- If the fish is frozen, thaw completely in the refrigerator before canning.
- Before you can, remove the head, tail and fins. Wash fish carefully in cold water. Split fish lengthwise. Cut into lengths suitable for jars. (About ¾ pound of filleted fish will fill one pint jar.) The bones can be left in and the skin can be left on for canning, or they can be removed. For halibut, remove the bones and skin.
- Pack fish tightly into hot half-pint or pint jars, leaving 1-inch headspace. If desired, add 1-teaspoon salt per pint. Do not add liquids.
- Wipe rims of jars with a paper towel dampened with vinegar. Adjust lids.
- Process in a pressure canner as follows:
- Dial gauge pressure canner, in pint or half-pint jars:
Process for 100 minutes. Canner pressure should be 11lb at 0-2000 feet elevation, 12lb at 2001-4000 feet elevation, 13 lb at 4001-6000 feet elevation, and 14 lb over 6000 feet elevation.
- Weighted-gauge pressure canner, in pint or half-pint jars:
Process for 100 minutes. Canner pressure should be 10 lb at 0-1000 feet elevation, or 15 lb at 1000 feet elevation or above.
Notes: For more information on the use of pressure canners or to have your pressure gauge tested, visit the Oregon State University Extension Service office at 4506 3rd Street in Tillamook.
by Guest | Aug 3, 2017 | Eat Well
By Lauren M. Kraemer, MPH, Extension Family & Community Health, Oregon State University/Wasco County Extension and Nancy Kershaw, Extension Family & Community Health/4-H Youth Development Faculty, Oregon State University/Tillamook County Extension
Fermentation is one of the easiest methods of preserving food and boasts the most health benefits, least energy consumption, and most variety and room for creativity (read: experimentation) over any other type of food preservation method. With a little bit of pure sodium chloride (salt) and your own hands, you can get delicious vegetable mixtures that are preserved for weeks or even months with no canners, dehydrators, freezers, or fancy kitchen equipment.
Food preservation is a science, not an art and bending the rules could result in deadly consequences. The one we worry most about is botulism and interestingly, cases only began showing up in historical records after canning was invented in the 1790’s. By creating a sealed, anaerobic (air free) environment, we create the perfect conditions for botulism to grow.
Fermentation on the other hand, creates an ideal environment for lactic acid bacteria which lower the pH of things like cabbage and kimchi so that bad bacteria like botulism less likely to grow. Fermentation does not require an anaerobic environment; jars need to breath, and burp, and bubble in order to release the carbon dioxide being produced as good bacteria grow. All of this makes fermented foods safer than fresh foods, which may have the risk of carrying disease causing microorganisms like E.coli, listeria, salmonella, mold etc. or canned foods which can harbor botulism and staphylococcus.
In the book, “The Art of Fermentation,” by Sandor Ellix Katz, he lends decades of experience as a fermenter, giving you the confidence to try your first batch of kraut or kimchi. Katz comments on the double entendre that is “culture” in the realm of fermentation. This word brings to mind agar plates and swabs of bacteria as he discusses the cultures of organisms that are created through fermentation. He writes that a healthy human gut has over 7 trillion bacteria and as we have come to eat highly processed, commercially produced foods, we end up losing a lot of that good bacteria because it is no longer introduced into our bodies through various fermented foods. The second idea of culture is of the broader family, national, or food culture. Koreans have kimchi, Germans have sauerkraut, Italians have wine, and the French have cheese. All of these cultural fermented foods play into the pleasure of eating and sharing a meal. Fermentation brings flavors out of foods that you would never experience in them fresh, let alone canned or frozen. You can experience the palate pleasing textures, tastes, and aromas of fermented foods.
OSU Food Preservation Resources
• Food Safety and Preservation Hotline 800-354-7319
Mid-July through mid-October, Monday-Friday, 9 am-4 pm
• Oregon State University Extension Service food preservation publications.
• Master Food Preserver Volunteer Training Coming Fall 2017.
Patterned after the popular Master Gardener program, the training includes 40 hours of training and 40 hours of volunteer time. Contact the Tillamook County Extension Office for more information: 503-842-3433.
Sauerkraut
Recipe Source: Oregon State University Extension
Number of servings: 5 lbs
Ingredients:
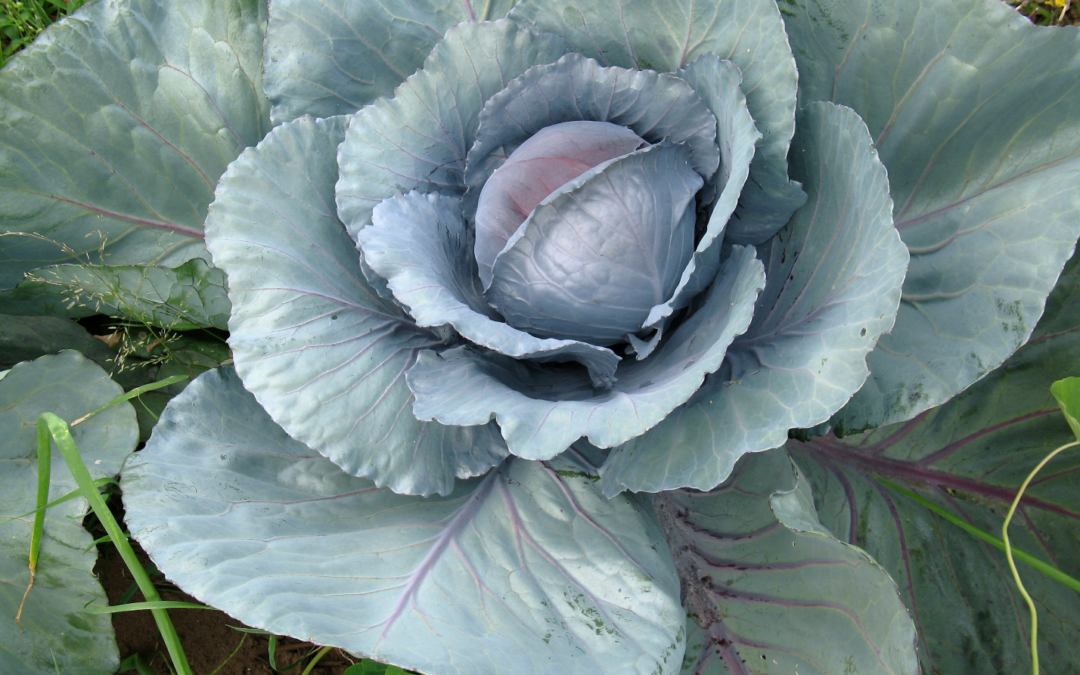
5 pounds shredded cabbage
3 tablespoons canning or pickling salt
Note: Select mature heads of cabbage that are disease-free. The best kraut is made from the mid to late season crop. If harvesting, wait 1-2 days after harvest to make the sauerkraut. Remove outer leaves and cores and shred cabbage into long and thin slices, about the thickness of a quarter. For 5 pounds of shredded cabbage you will need between 6-7 pounds, about 3-4 medium heads.
Equipment:
Large plastic or stainless steel mixing bowl
Food-grade fermenting containers (Do not use copper, iron or galvanized-metal containers or garbage bags and trash liners.)
Note: One-gallon glass or plastic jars work well for 5 pounds of cabbage. 5 pounds of cabbage will fill about 3-quart jars or one large gallon container with room for a brine bag or weight.
Directions:
• Place shredded cabbage in a large bowl and sprinkle salt evenly over cabbage.
• With clean hands, thoroughly mix the salt into the cabbage. As the salt dissolves, the cabbage will begin to wilt and become juicy.
• Pack the cabbage firmly into the food-grade fermenting container, pressing evenly with your fist.
• As you pack it you will notice the brine coming from the cabbage. You will need enough brine to cover the cabbage. Leave at least 4-5 inches of headspace.
• Put a weight on the cabbage to keep the cabbage covered with brine while fermenting. Wipe the edges of the jar or crock before putting the weight on top. For glass jars, use a freezer-weight plastic bag filled with brine made of 1½ tablespoons salt per 1 quart of water. For crocks, use a plate and weigh it down with a jar of water or a plastic bag filled with brine.
• Cover the fermenting container with a clean tea towel or cheesecloth to reduce mold growth. For glass containers, cover the jar with a brown paper bag to keep the light off of the kraut while it is fermenting. This helps retain nutrients and preserves the color of the kraut.
• Store at 70-75ºF while fermenting. At 70-75ºF sauerkraut will be fully fermented in about 3-4 weeks; at 60-65ºF fermentation may take 5-6 weeks. At temperatures lower than 60ºF sauerkraut may not ferment. Above 75ºF sauerkraut may become soft. The smaller the fermenting container the faster it will ferment.
• If you weigh the cabbage down with a brine-filled bag, do not disturb the crock until normal fermentation is completed. If you use a plate and jar, check the sauerkraut 2-3 times each week and remove scum if it forms.
• To see if kraut is ready is to smell and taste it. It should smell and taste like kraut not sour cabbage.
Happy Preserving!
Notes: Recipes for how to use your kraut can be found at Oregon Sate University Extension: http://extension.oregonstate.edu/lane/sites/default/files/documents/sp50611makingsauerkraut.pdf
by Guest | Aug 3, 2017 | Eat Well, Recipes
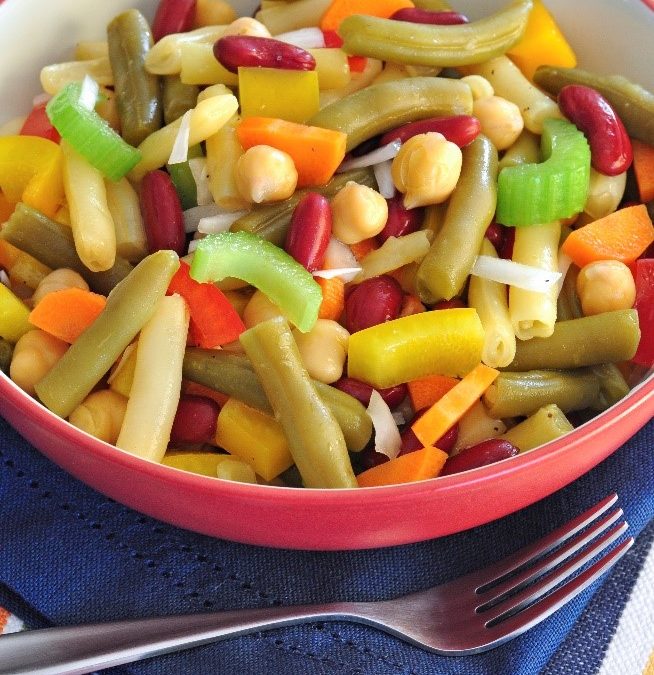
Are you planning a backyard barbecue or picnic? This recipe is great for a crowd!
Recipe Source: Food Hero http://foodhero.org
Number of servings: 12
Time for preparation (including preparation and cooking): 10 minutes
Ingredients:
1/4 cup vinegar
1/4 cup sugar
2 tablespoons oil
1/4 teaspoon each salt and pepper (optional)
6 cups canned beans, about 4 cans (15 ounces each) drained and rinsed (try a mixture – green beans, wax beans, kidney beans, garbanzo beans)
2 cups of your favorite chopped vegetables (try a mixture of red onion, carrot, celery, bell pepper)
Directions:
- In a large bowl, combine vinegar, sugar and oil. Mix well. Add salt and pepper, if desired.
- Add beans and vegetables and gently stir to coat. Cover and refrigerate until ready to serve. For more flavor, make a day ahead.
- Refrigerate leftovers within 2 hours.
Note: Add a little tangy flavor by throwing in some pickled vegetables like pepperoncinis, beets, or cauliflower.