This is one of the good things that has come from the pandemic – Judith Yamada’s cookbook “Thrifty Comfort Cooking for Challenging Times.” Seeing a need to help all cooks be more efficient in the kitchen when dealing with food shortages and high prices, Yamada’s cookbook provides a welcome guide to making the most of what you on hand. Filled with helpful tips as well as dozens of delicious (and easy!) recipes this cookbook is truly a comfort, that will also benefit our local Food Bank.
Yamada has written articles for several publications as “The Kitchen Maven”, she says, “I’ve always loved to cook and bake – and eat.” She continues, “When the 2020 pandemic brought upheaval to everyone on the planet, my first concern as a senior citizen was for my own health, that of my family and for the lives in my community. Thankful for being retired, healthy and financially secure, Yamada spent her time in isolation improving her own health (she lost 40 pounds) and creating this cookbook in support of people experiencing food insecurity.
Daily life during a pandemic is unnerving enough without constant worries over whether you will go hungry tomorrow or have enough nutritious, sustaining meals to feed your family. This ongoing shortage has become more crucial than ever as local hunger relief programs observed a 40% rise in food insecurity and the need for assistance during the pandemic. According to Yamada, “I vividly remember being a young mother, scrimping to buy my toddler meat and vegetables and being grateful for my own meal of oatmeal and tea.” The current situation is even more challenging.
In February 2021, while focusing on improving her own health, she began writing a cookbook of modern cooking for challenging times, and these are definitely challenging times. The recipes are geared to help people cook with what they have at hand, to make substitutions as needed, and to easily and frugally incorporate more nutrition into everything from soups to desserts.
“My objective in writing this cookbook was to share wholesome, comforting, and thrifty recipes to help all cooks be more creative using whatever ingredients are available – fresh seasonal, frozen, or canned, and combine foods to improve both nutrition and satisfaction,” says Judith
Most of the recipes are simple with a few basic ingredients. Many contain nutrient-boosting additions to enrich common meals and retain great taste, and offer a variety of options, so cooks may substitute with ingredients they have on hand. Being more flexible with ingredients, saves money and can increase nourishment in our meals and snacks; we can all eat better, waste less and enjoy mealtime more than ever.
To maintain services for those affected by food insecurity, local Food Banks and other food relief agencies need continued aid. Whether we make monetary donations, volunteer our time, or write and contribute a cookbook, we can all help.
The Oregon Food Bank and the services it supports will be the recipients of all profits from the cookbook, and copies of the cookbook will be donated to the local Tillamook Food Bank for free distribution to Food Bank clients.
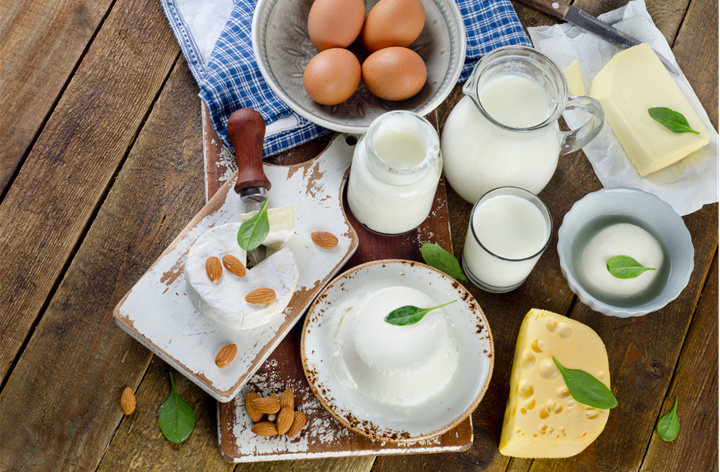
You may have heard that dairy foods like milk, yogurt, and cheese are foundational in a balanced diet, but did you know that there is strong emerging evidence that dairy foods could help you reduce your risk for Type 2 Diabetes (T2DM)? Here are 5 tips to help prevent or manage T2DM, while still enjoying some of your favorite dairy foods:
Mix up your Movement and Power up with Protein – Incorporating a great mix of both aerobic (walking, running, hiking, etc) and resistance exercise (strength training, body-weight movements, etc.) throughout your week can have tremendous benefits in managing T2DM risk factors. Fueling up with a good protein source after exercise can also help give your body the amino acids needed to gain muscle, which can help improve how your body responds naturally to insulin and blood sugar. Top a cup of low fat Greek yogurt with a handful of fresh berries for a perfect, protein-packed after workout snack!
Find balance with your Carbohydrates – Keeping track of the amount of carbohydrates you’re consuming in meals and snacks can make a world of difference for managing and preventing T2DM risk factors. Carbs can occur naturally in whole foods, or through processing with added sugars, starches, and syrups. Though the amount of carbs an individual needs vary, a single serving is considered 15 grams. Many dairy foods like milk, plain Greek yogurt, cottage cheese, and string cheese all naturally fall below the 15 gram mark for carbs per serving, and are a great option for those looking for a satisfying, carb-controlled food choice.
Rethink your Drink – Sugar-sweetened drinks like soda, juice beverages, and energy drinks can sneak hundreds of “empty”calories (no nutritional value) into your diet without satisfying hunger. These drinks are loaded with simple carbohydrates that can wreak havoc on your ability to control blood sugar. If you’re looking for a mood-boosting drink alternative, try enjoying a glass of milk which is packed with natural B vitamins to give you an energizing pick-me-up.
Consistency is key – Whether you’re trying to manage your weight, blood sugar levels, or both, one of the best strategies to practice is consistency with meals and snacks throughout your day. Sticking to a routine will help keep hunger at bay, prevent overeating, and provide consistent energy to feel your best. Most adults also struggle to get the nutrition needed from the USDA’s recommendations of 3 servings of dairy daily; so practicing consistency with your diet will give you more chances to add in some of your favorite foods from this group.
Eat the Rainbow – Eating a colorful variety of foods from all food groups is key to living your best life, and can help you prevent and manage your diabetes risks. Here are some tasty and healthy combinations with other food groups from OSU Extension Food Hero you can try with your favorite dairy foods:
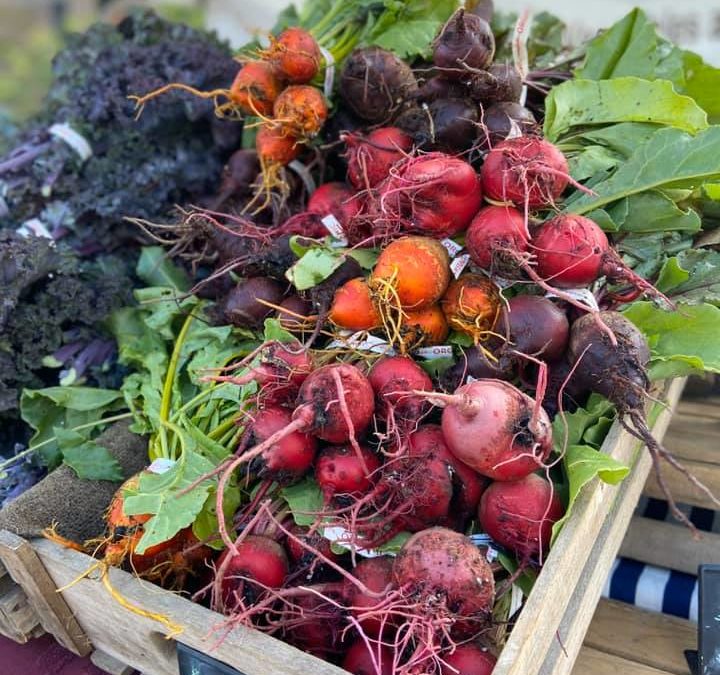
May marks the return of farmers market season to Tillamook County, and this year you can find even more markets dotting the coastline from Neskowin to Manzanita operating four days a week from mid-May to October.
Each market offers its own personality and unique set of vendors, and several offer shopping incentives for seniors, youth, and SNAP customers. This year, markets that participate in the Double Up Food Bucks (DUFB) Program are increasing their SNAP match from $10 to $20. That means SNAP customers who spend $20 at a participating farmers market can receive an additional $20 to spend on fresh fruits and vegetables, nuts, mushrooms, and plant starts. Customers can only receive the match once per day, however the DUFB dollars can be spent at any market in the state that accepts them. Markets offering DUFB in Tillamook County include Neskowin, Tillamook, and Manzanita.
Neskowin Farmers Market
The Neskowin Farmers Market is returning to the Proposals Art Center for 2022, located at the corner of Hwy 101 and Summit Road – across the highway from the Neskowin Beach Wayside. The market moved to this new location in 2021 as part of the Proposals For All project that is working to establish a sustainable, creative platform centered around art and experience along the rural Oregon coast in Neskowin.
The Neskowin Farmers Market opens May 21 and runs through October 2. You can find them every Saturday from 9 a.m. – 1 p.m. This year their vendor lineup includes fresh fruits and vegetables, pastured meats, local cheeses, canned goods, and bakery items, fresh flowers and plants, wood-fire pizza, fiber arts, photography, jewelry and other arts and crafts. You can also enjoy live music while you shop.
The Neskowin Farmers Market is enrolled in the Double Up Food Bucks program, and certain vendors can accept Farm Direct Nutrition checks.
Pacific City Farmers Market
The only Sunday Market in the county, the Pacific City Farmers Market opens June 12th and runs through Sept. 25th from 10 a.m. to 2 p.m. This quaint market is located in the parking lot of the Pacific City Library at 6000 Camp Street on the corner of Brooten Road. They’ve added several farms to their line up this year so shoppers will enjoy plenty of fresh fruits and vegetables, as well as cheese, eggs, handcrafted soaps, jewelry, homemade pottery and delicious baked goods.
Tillamook Farmers Market
The Tillamook Farmers Market opens June 11th and operates every Saturday from 9 a.m. – 2 p.m. through Sept. 24th. The market is located on the corner of Laurel Avenue and Second Street – directly in front of the Tillamook County Courthouse.
This season you can expect to find live music every Saturday, kids games, and plenty of hands-on activities. You will also find a wide array of vendors selling everything from outdoor furniture, homemade rugs, tie dye, smoked cheese, microgreens, fruits and vegetables, fresh-cut flowers, nursery trees, soaps and beauty products, photography and other art.
The Tillamook Farmers Market accepts SNAP payment, and is enrolled in the Double Up Food Bucks Program. The market also offers $2 Kids Bucks for youth under age 12 to spend on fruits and vegetables, and certain vendors accept Farm Direct Nutrition checks.
Garibaldi Night Market
Located under the giant event tent on Tillamook Bay, the Garibaldi Night Market is hosted by the Port of Garibaldi once a month May through August. There is no charge to get in, and customers can enjoy live music, kids games, hot food and local vendors selling a wide variety of products – including fresh-off-the-dock seafood. The hours are 4 – 8 p.m. and the market will run May 26, June 30, July 21, August 11 and September 1.
Manzanita Farmers Market
The Manzanita Farmers Market is extending their season by five extra days this year. The market opens Memorial Day Weekend on May 27th at 4 p.m. and runs through October 7th. They will be located again this year at the Underhill Plaza (635 Manzanita Avenue). This is a Friday evening market and with 57 regular vendors and five hot food vendors; it is the largest farmers market in the county.
The Manzanita Market also accepts SNAP and Double Up Food Bucks, and certain vendors can accept Farm Direct Nutrition Program checks.
We know that what we eat matters for our health. What might be a surprise is that our relationship with food, where it comes from, and who we eat it with are just as important. Exploring these things and being intentional with our eating patterns can help us develop healthier habits and improve our overall quality of life.
The path to eating well doesn’t have to involve kale smoothies or vegan nut cheese, it will look different for each person. That’s why we included many different ways for eating well in our This Way to Well-Being map. (Information about the map and related campaign can be found here.)
You may have tried eating healthier in the past without much success. The key to changing our habits is to find our own “hook.” Do you enjoy being outdoors? Do you want to have more energy? Are you interested in supporting local businesses? Your path to well-being involves exploring activities that are meaningful and interesting to you.
There are several food-related “points of interest” along the Way to Well-Being map, including:
Plant a Garden
Eat More Fruits & Vegetables
Cook a New Healthy Recipe
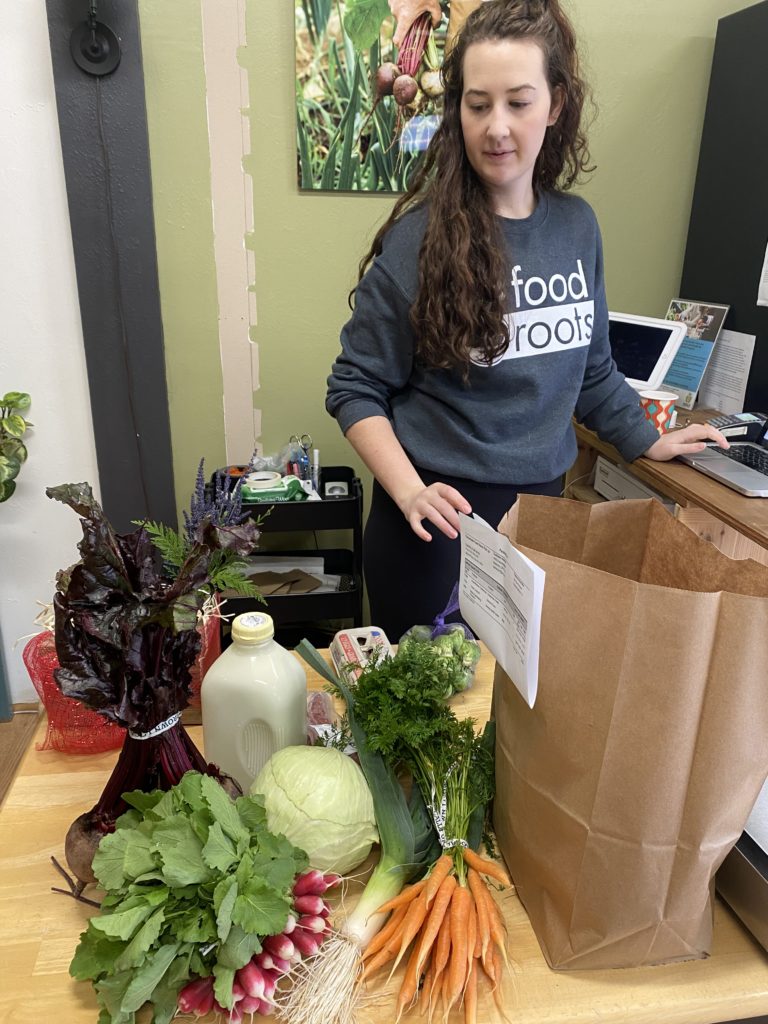
Visit Food Roots (Storefront in Downtown Tillamook)
Visit a Farmers Market
Do any of these appeal to you? Maybe you have been thinking about growing your own food for a while and just haven’t taken those first steps yet. Or perhaps, you have thought about supporting local farms or buying locally sourced foods but weren’t sure where to start.
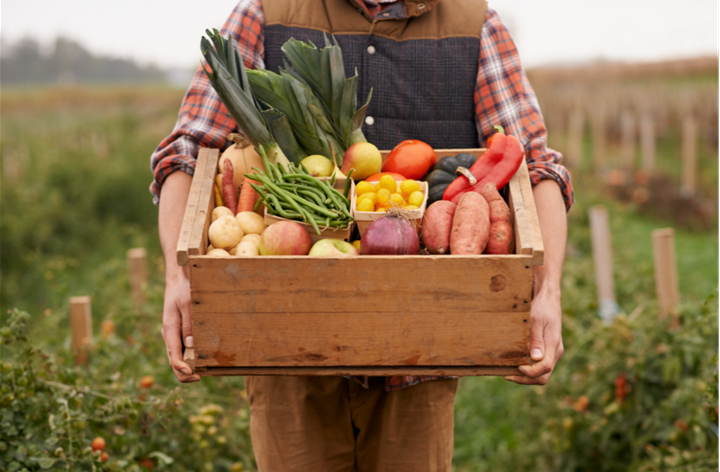
Convenience drives our behavior and decision making. If we know where to find food at the local grocery store, we may not be willing to invest the time in finding local products in other locations. The Food Roots storefront in downtown Tillamook has year-round sales of local produce, eggs, meat, sea salt, honey and other products. Farmers Market season is just around the corner and markets are located throughout the county. Scheduling a visit to one of these locations before doing your regular grocery shopping ensures you get fresh, locally sourced products into your weekly meal plan.
Knowing where our food comes from – who is tilling the soil and bringing these nutrients to our plates in our own homes, is important. If we garden, we reap the health benefits of that directly. If we buy from local producers, we are supporting our local economy. Either way, it’s a win-win.
In the same way, preparing our own food changes our relationship with it. The time and care it takes to turn raw ingredients into a soup, salad, or omelet, makes a big difference. Better yet, cooking as a family and teaching our children how to grow their own food and make their own meals is one of the most lasting gifts we can give them. After all, everyone eats throughout their entire life. Encouraging young people to think about how their bodies need food as fuel can help them establish healthier habits earlier in life and could prevent chronic diseases like type 2 diabetes later in life.
When we eat food that we prepare ourselves, we consume less salt, sugar and fat as these are added to commercially processed foods so that we will buy and eat more of those products. It can feel overwhelming to shift our habits, but at the same time, it can give us perspective to grow our own tomato plant and have fresh, sliced tomatoes on a sandwich we pack in our own lunches. There is a deep sense of satisfaction in providing for ourselves and by supporting others in our community. And, of course, there are the health benefits that come from eating more nutritious foods.
For information and resources about points of interest for eating well, visit our This Way to Well-Being page and explore our website. By participating in our well-being campaign, you may be eligible to win a prize. To be entered into a prize drawing, visit Food Roots at 113 Main Avenue in downtown Tillamook, and let them know you are there as part of the campaign. You can also participate by taking an online survey or by posting and tagging us on social media.
AUTHOR: Michelle Jenck, Adventist Health Tillamook Director of Community Well-Being
Oregon’s North Coast is home to dozens of small, independent food businesses including farmers, ranchers, fishers, and value-added producers. This bountiful region is well known for its diverse variety of foods that are harvested, grown, or produced throughout the year, including beef, pork, lamb, dairy products, fish and shellfish, honey, vegetables, and craft beverages. Food Roots believes that a reinvestment in those who produce, harvest, and sell our local food will nourish our families, revitalize our communities, and grow our economy. Since 2006, Food Roots has been working to support small producers in Tillamook County through a variety of programs that increase access and affordability to local foods, promote healthy eating and garden education in schools, and support economic development of small food and farm businesses. Our projects and activities are divided in three main programs: Farm to School, Local Food Equity and Producer Support. Read below to learn more about our role in Tillamook county’s local food system and how you can support our mission!
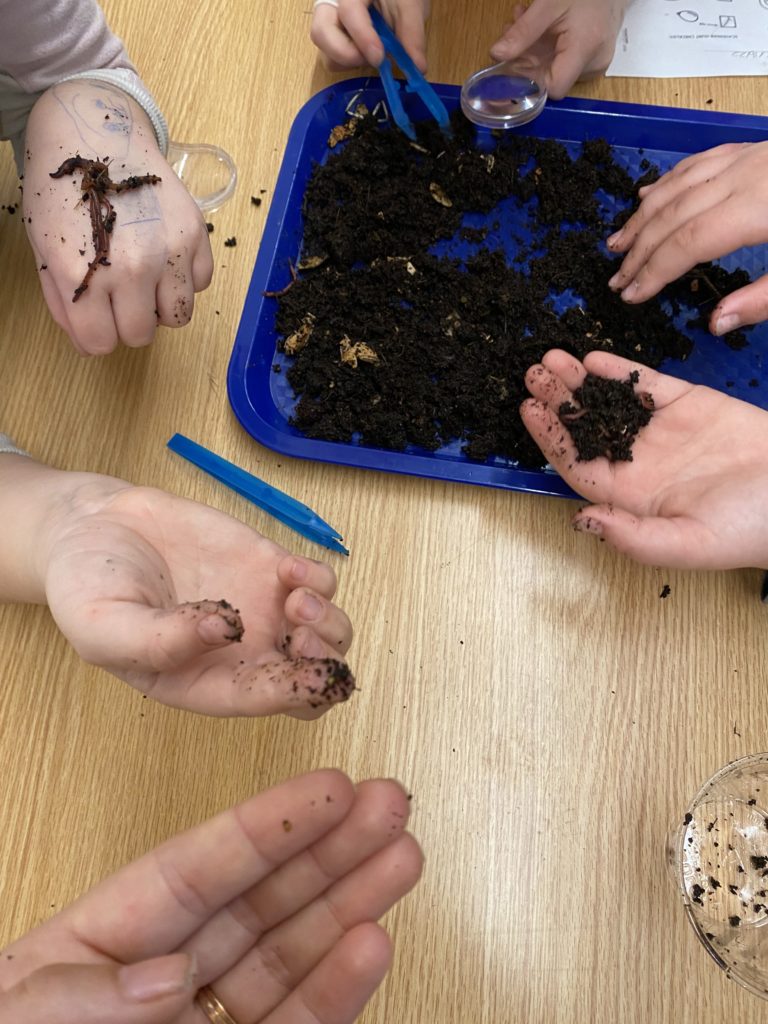
Farm to School Program: The National Farm to School Network has summarized research that shows the benefits of Farm to School programming including increasing students’ preferences for fresh fruit and vegetables, improving performance in school (science in particular), and impacting positive social behavior. The programming we provide is rooted in this research: we focus on hands-on activities that encourage inquiry and critical reasoning and prioritize activities that complement Next Generation Science Standards and Common Core ELA and math standards.
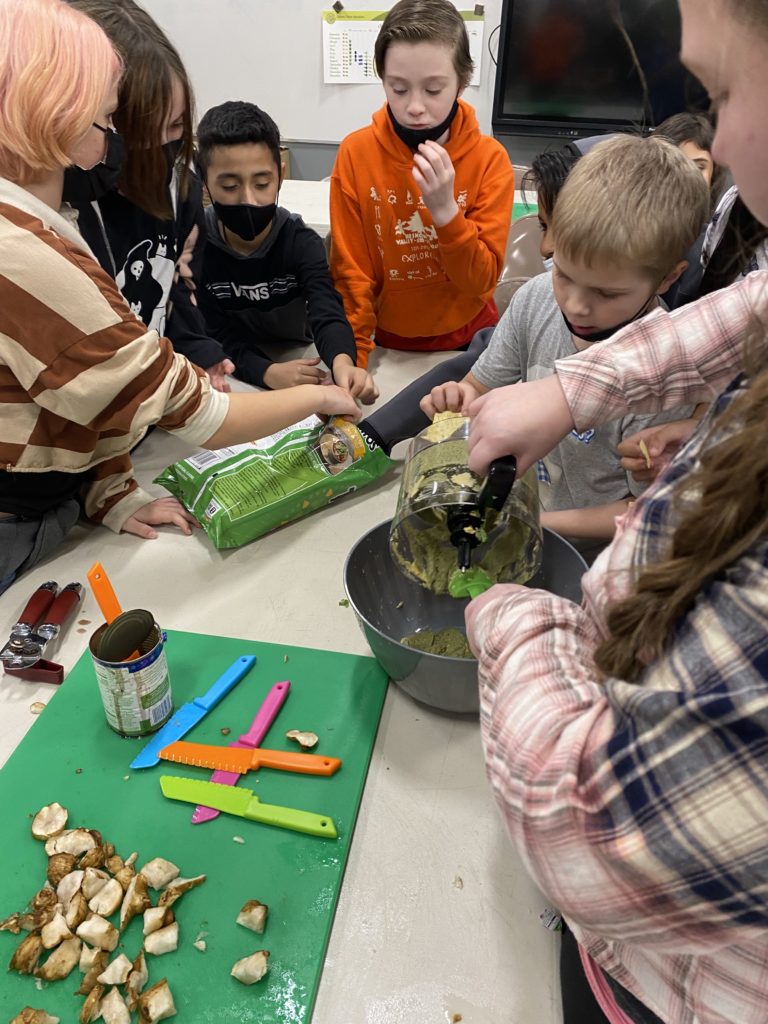
We currently partner with five different schools for the 2021-2022 school year: Garibaldi Grade School, Tillamook Junior High, East Elementary, Nestucca Valley Elementary and Nestucca Valley Early Learning Center. Every week, our farm to school educator visits classrooms to bring enriching garden-based lessons. We also organize school-wide tastings that feature a vegetable grown by a local producer and organize field trips to local farms. Every month we are engaging with over 750 students!
Producer Support: Food Roots is a provider of Individual Development Accounts (IDAs). IDAs are a matched savings program that enables low to moderate income entrepreneurs to save money to either start or expand a food system business. Food Roots’ IDA participants receive a 3:1 match on their IDA savings, meaning that for every $1 a participant saves, the program will match it with $3. Participants can save a combined total of $12,000 in savings and matched funds over three years. In addition to consistent monthly savings, participants learn important business skills such as cash‐flow projection, financial management, and marketing through free, required classes provided by partners like the local community college, Oregon State University Agricultural Extension, and local financial institutions. Once participants have reached their savings goal and completed the required classes, they can use the money to finance business‐related expenses.
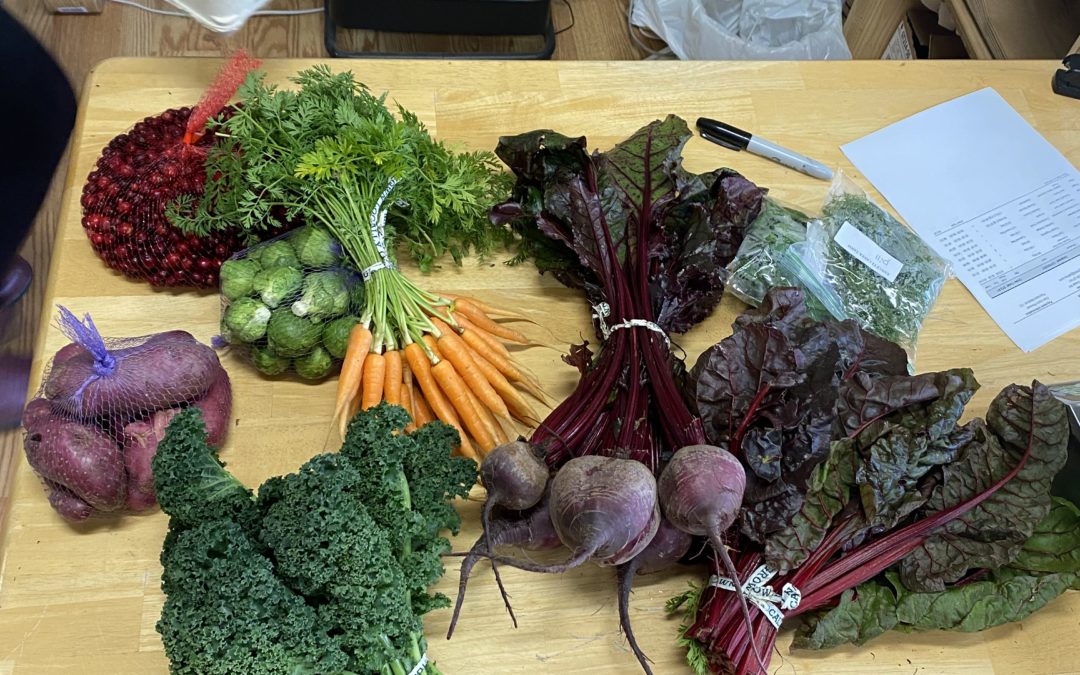
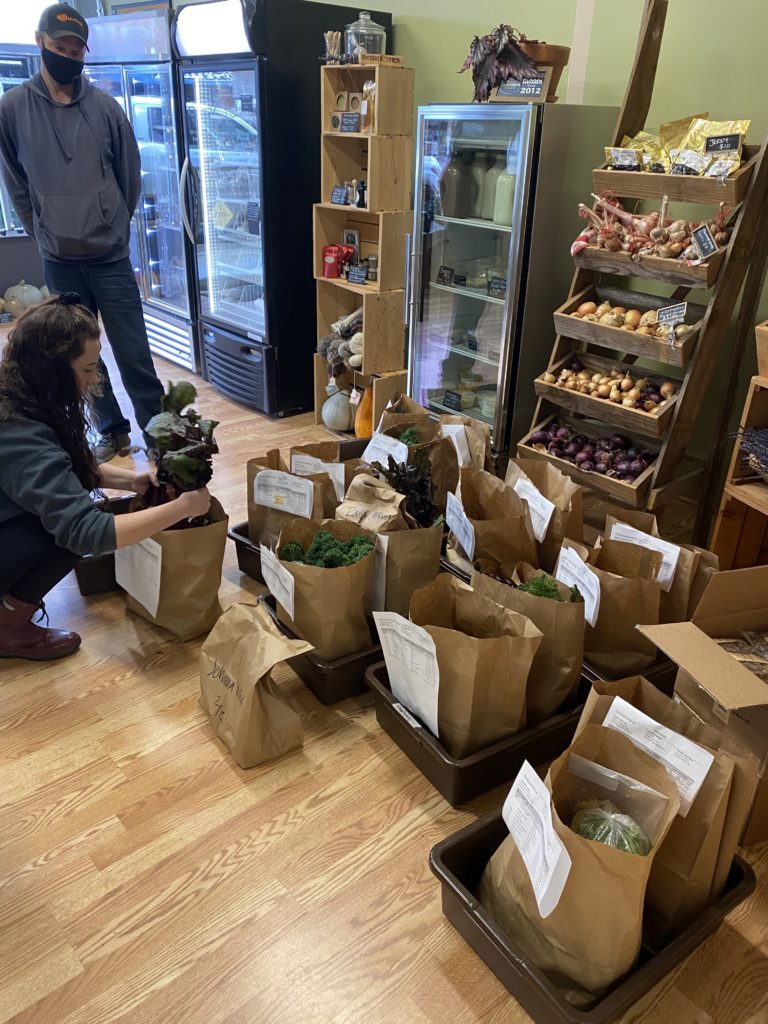
In the past few years, we have expanded our support to producers with the opening of our brick and mortar storefront, Food Roots Marketplace (formerly FarmTable). Opened in February 2018, Food Roots Marketplace has proven a popular outlet to connect our community and its visitors directly to our area’s food producers and their products. We feature over 50 local vendors and a variety of value-added products and fresh local produce that are stocked weekly. Customers can choose to visit our storefront (open weekly from Tuesday to Friday from 2-5:30pm) or shop online by visiting our website foodrootsnw.org (click on the “Online Marketplace” button on the top left). The online ordering window opens every Tuesday at 5:30pm and closes on Saturday at 11:59pm. The addition of the online platform has created an efficient system that allows producers to only harvest what they have sold. Producers update their inventory with produce that is available on the farm. Once the ordering window closes on Saturday, farmers check what they have sold on Sunday and bring all the orders to the store on Monday. When the store opens on Tuesday, all the orders are packed and ready to be picked up at our store! As part of our mission of making local food more accessible, we have also added a delivery program that brings online orders to the customer’s front door or to one of our 3 pick-up site locations spread across the county (Wheeler, Netarts and Cloverdale).
Local Food Equity: We believe everyone in Tillamook should have access to healthy, fresh, local food, so we have a few programs to increase affordability. Double Up Food Bucks (DUFB) is a SNAP (formerly called Food Stamps) matching program that incentivizes federal benefit food dollars to be spent on locally grown food at farmers markets and grocery stores that sell local food. At Food Roots Marketplace, we expand on Double Up Food Bucks, by doubling the matching program and expanding it to all SNAP-eligible food items. Using additional internal funds and community fundraising, SNAP shoppers can save up to $20 on every order!
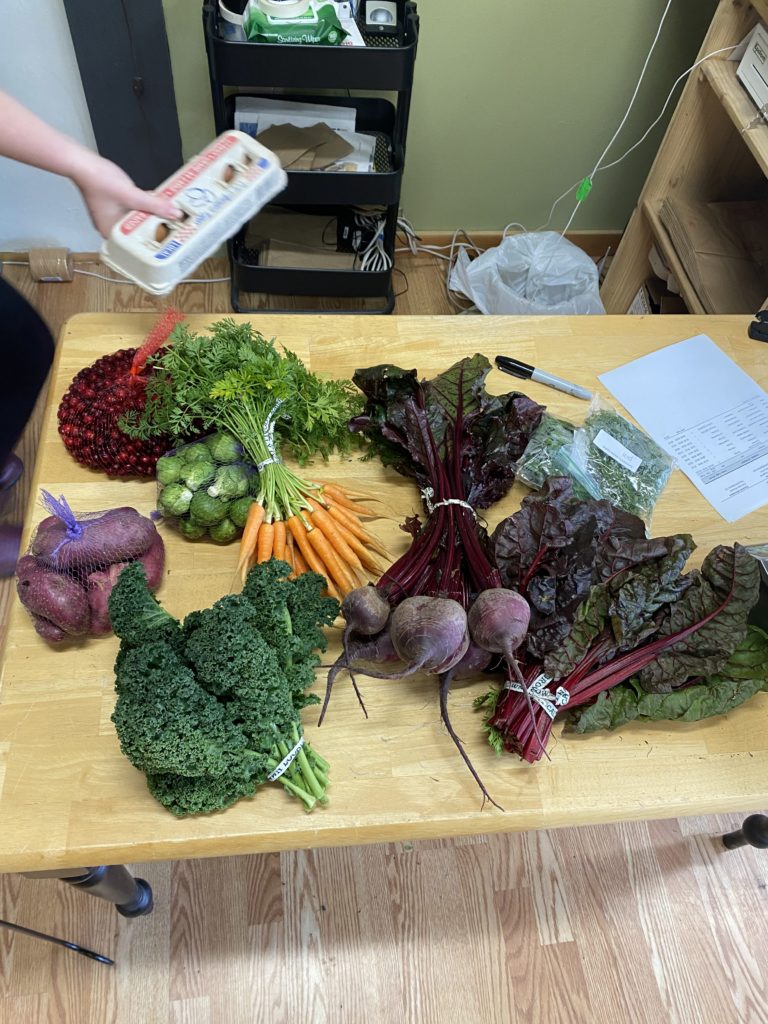
Through this savings program, SNAP shoppers can also save up to $250 on CSA shares. CSA, or Community Supported Agriculture, is a model that provides customers with weekly boxes of fresh, seasonal produce, while supporting farmers with income early in their growing season. We partner with local farms to make CSA shares available at Food Roots Marketplace. CSA shares generally run from June through October or November. We will soon post sign-up information for CSA shares on our website, so stay tuned!
Finally, we partner with various organizations that serve socially-disadvantaged groups to provide bounty boxes- a limited time subscription to locally sourced, seasonal products that are delivered weekly. SNAP shoppers that sign-up for a bounty box receive half-off.
Food Roots relies on our strong community partners to accomplish our mission. Food Roots is the north coast hub lead for the Oregon Farm to School and School Garden Network, a member of the Oregon Community Food Systems Network, and a leader in the Tillamook County Wellness coalition, a ten-year initiative to reduce and prevent diabetes through access to healthy food, physical activity, workplace wellness and screenings. Without volunteers and community support, none of these programs would be possible. Please consider donating and/or volunteering or contact Food Roots for ways you can help us in our mission to cultivate a healthy food system in Tillamook County.
AUTHOR: Carol Parks, Program Manager at Food Roots
Since the Food Stamp Act passed in 1964, qualifying low-income Americans have had access to benefits to buy groceries. Known now as SNAP, the Supplemental Nutrition Assistance Program also provides nutrition education and obesity prevention under its SNAP-Ed component. The goal of SNAP-Ed is to improve the likelihood that persons eligible for SNAP will make healthy food choices within a limited budget and choose physically active lifestyles consistent with dietary guidelines. Oregon SNAP-Ed supports this goal by providing evidence-based educational programming, using social marketing, and supporting or implementing policy, systems, and environmental changes that affect the food and activity environments where people live, learn, work and play.
The Oregon State University Extension Service developed the Food Hero initiative to support the State’s SNAP-Ed program. On the Food Hero website at www.FoodHero.org you can find information on food safety, how to cook for a crowd, cultural toolkits, activities for kids, instructional videos, recipes and much more. All recipes on the website go through testing. In addition to being tested for overall flavor, color, and texture, recipes with low-cost and easy to find ingredients, easy to follow instructions, and a reasonable preparation time are selected. Each recipe is tasted and rated by several people before making its way to your kitchen.
In addition to the Food Hero site, a monthly newsletter called Food Hero Monthly has great information that is helpful for the season like how to freeze garden veggies in the summer, or healthy holiday dishes in the winter. OSU’s SNAP-Ed also provides in-person classes and talks. Take a moment to check out the site and you can become your own Food Hero.