by Guest | Jul 23, 2016 | Eat Well, Recipes
By Dana Zia, The GoLightly Gourmet
“When it comes to picnic food, I can’t help but think of the American staple, potato salad.” Debi Shawcross
Summer time around here in the temperate rainforest that we inhabit is just getting started, and the season has begun where families and friends gather to celebrate around picnic tables ladened with hot dogs, chocolate chip cookies and the iconic potato salad.
Growing up, I can not remember a picnic, family reunion or summer BBQ without a potato salad. It is no wonder they are so popular at these functions as they are easy to fix ahead, effortlessly made into large quantities and are cheap to make. Oh, and everybody loves them.
Despite the potato salad’s popularity here in the good old US of A, this is not the country of origin. Germany is the culprit. I mean after all, Germany is a country with lots of potatoes and lots of recipes for potatoes. They like to blanket cooked chunks of potato with a warm vinegar dressing and bacon. (Love those guys!)
The potato salad caught fire here in the mid 19th century, brought here by German immigrants. A mysterious thing happened to this salad when it became Americanized. Someone started making it with mayonnaise. There is some speculation that Richard Hellman, the founder of Hellman’s mayonnaise, was the originator of this American standard at his New York deli in 1905.
Over the years, the humble potato salad started to take on a renaissance of sorts. People experimented with different types of dressings that didn’t include mayo. They started tossing in things like pesto, green chilies and capers. Before too long, our potato salad that we all know and love has become as varied and diversified as our population. It truly is an American dish now.
I have found that there is no wrong way to make potato salad. Many families have some familial recipe that they adhere to but I am born to experiment. I found there is only one rule to abide by; always use the very best potatoes you can buy. Yukon gold, baby reds and French fingerlings are fantastic in potato salads.
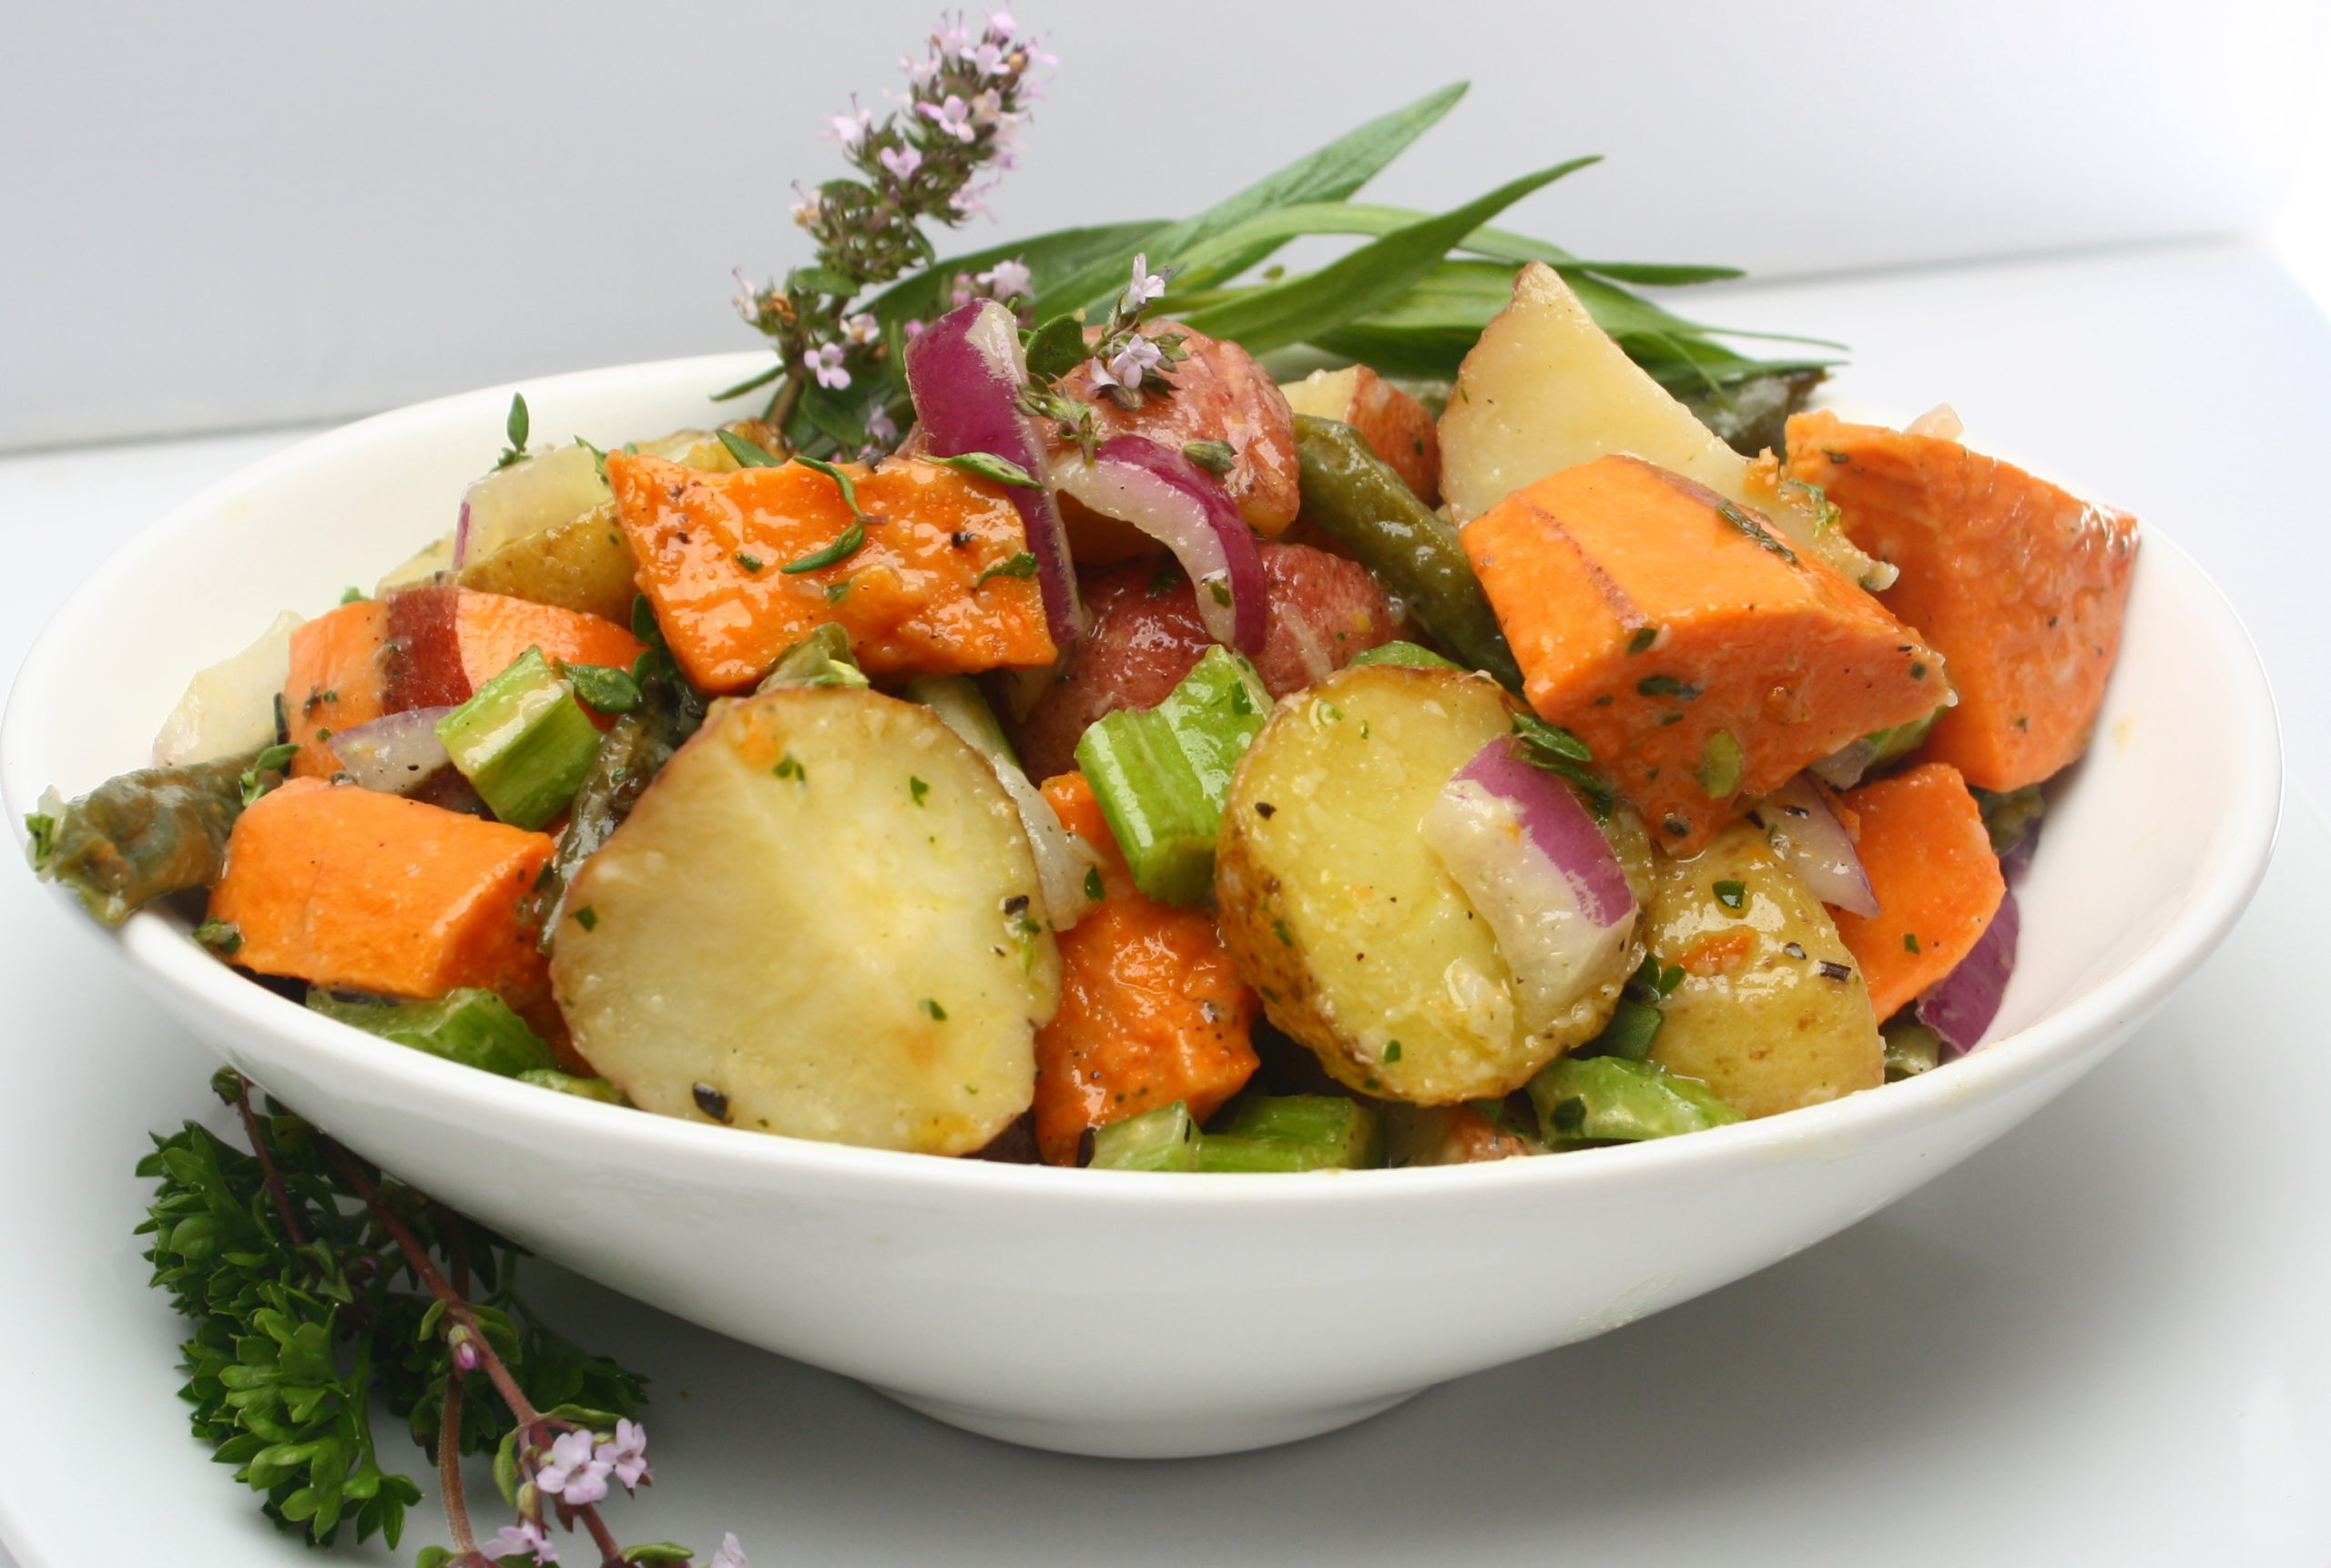
This lively potato salad that I feature here has two adaptations for the mood or circumstances. If you are going to a function where refrigeration is an issue, choose the first dressing, which is marvelously stable. The second dressing is creamier and needs to be refrigerated. Roasting the potatoes is a wonderful way to prepare them making them flavorful and firm.
Roasted Garlic Potato Salad
The salad
2 medium sweet potatoes
2 pounds of small Yukon gold potatoes
2 pounds of baby red potatoes
1 pound of fresh green beans
1 sweet onion chopped
2 – 4 heads of garlic
2-4 tablespoons of olive oil
1/2 teaspoon of black pepper
1/2 teaspoon of salt
4 ribs of celery chopped
1/2 red onion, finely chopped
4 pieces of cooked bacon, crumbled (optional)
Dressing #1
1/4 cup of olive oil
2-4 tablespoons of grated parmesan cheese
Zest of a half lemon
Juice of a half lemon
2 tablespoons of fresh herb(s), such as tarragon, dill or thyme
2 tablespoons of fresh parsley
The baked garlic
Fresh cracked pepper and salt to taste
Dressing #2
1/2 cup of mayo
2 tablespoons of Dijon or a hot mustard
2-3 tablespoons of olive oil
2 tablespoons of chopped fresh herb(s) such as tarragon or thyme
2 tablespoons of fresh chopped parsley
The baked garlic
Fresh cracked pepper and salt to taste
Preheat the oven to 400 degrees. Wash and chop your potatoes, onion and green beans into bite size uniform pieces. Place in a large bowl and drizzle with olive oil and salt and pepper. Using your hands, toss potato mix until all is coated. Spread them on a baking sheet. Take the garlic heads and chop off the top to reveal the top of each clove. Rub the head chopped side down in the oiled bowl to coat with olive oil. (There should be some left in the bowl that didn’t stick to the potatoes.)
Tuck the garlic blubs in the potatoes face up and put in the oven to bake. Bake for about 30 minutes till tender but firm, stirring once during the bake time. When the potatoes are done cooking, let them cool till room temperature. When the garlic blubs are cool enough to handle, squeeze the cloves into a small bowl then mix together the dressing of your choice. I like to do the dressings in the blender but they can be whisked together as well.
Dump the potato mix into a large beautiful bowl and toss in the red onion, bacon crumbles and celery. Drizzle the dressing over them all and toss together till well mixed then either serve right away or keep in the fridge till your ready. As with many of these kinds of dishes, they are better the next day. Enjoy!
by Guest | Jul 22, 2016 | Eat Well
By Dana Zia, The Golightly Gourmet
When is the last time you went on a picnic? I mean an honest to goodness, basket full of goodies, let’s feed the ants picnic? I thought so. It’s been a while, huh? Me too. I think with our “go faster, get more done” lifestyles it just seems easier to eat at home or at a restaurant and then go. But there is something so delightful and memorable about a good old fashion picnic that I think we all need to slow down and make them happen more often.
Eating outside can take a simple walk and turn it into an enjoyable adventure, a romantic occasion or just a welcome change of pace. A picnic doesn’t really have to be a big production; you can just grab some peanut butter and celery sticks and head for the park or you can plan a bit and make it just a wee bit more special. Taking the time to enjoy life outside, particularly in these warmer summer months, is a great way to invite healthy lifestyle into your life.
There are many great foods to take but there are several wrong foods to avoid for picnics; foods that will spoil, foods that are meant to be very cold, or piping hot, since you can rarely guarantee either; and foods that require labor-intensive eating methods. (Messy is bad) Stay away from these foods and you will find your outdoor meals much more relaxing and fun.
There are the classic picnic foods that many of us grew up on and are devoted to like potato salad, sandwiches and watermelon. They are easy to fall back on. Yet I encourage us to expand our picnic repertoire and embrace some new and very easy foods. (Let’s keep it easy so we’ll actually do this!) I have compiled a list of some deliciously easy foods for your gastronomic soirée out into the great outdoors. Hopefully all these ideas will stimulate you to get out and enjoy nature and tasty food in this beautiful season. Go picnicking for a better tomorrow and life!
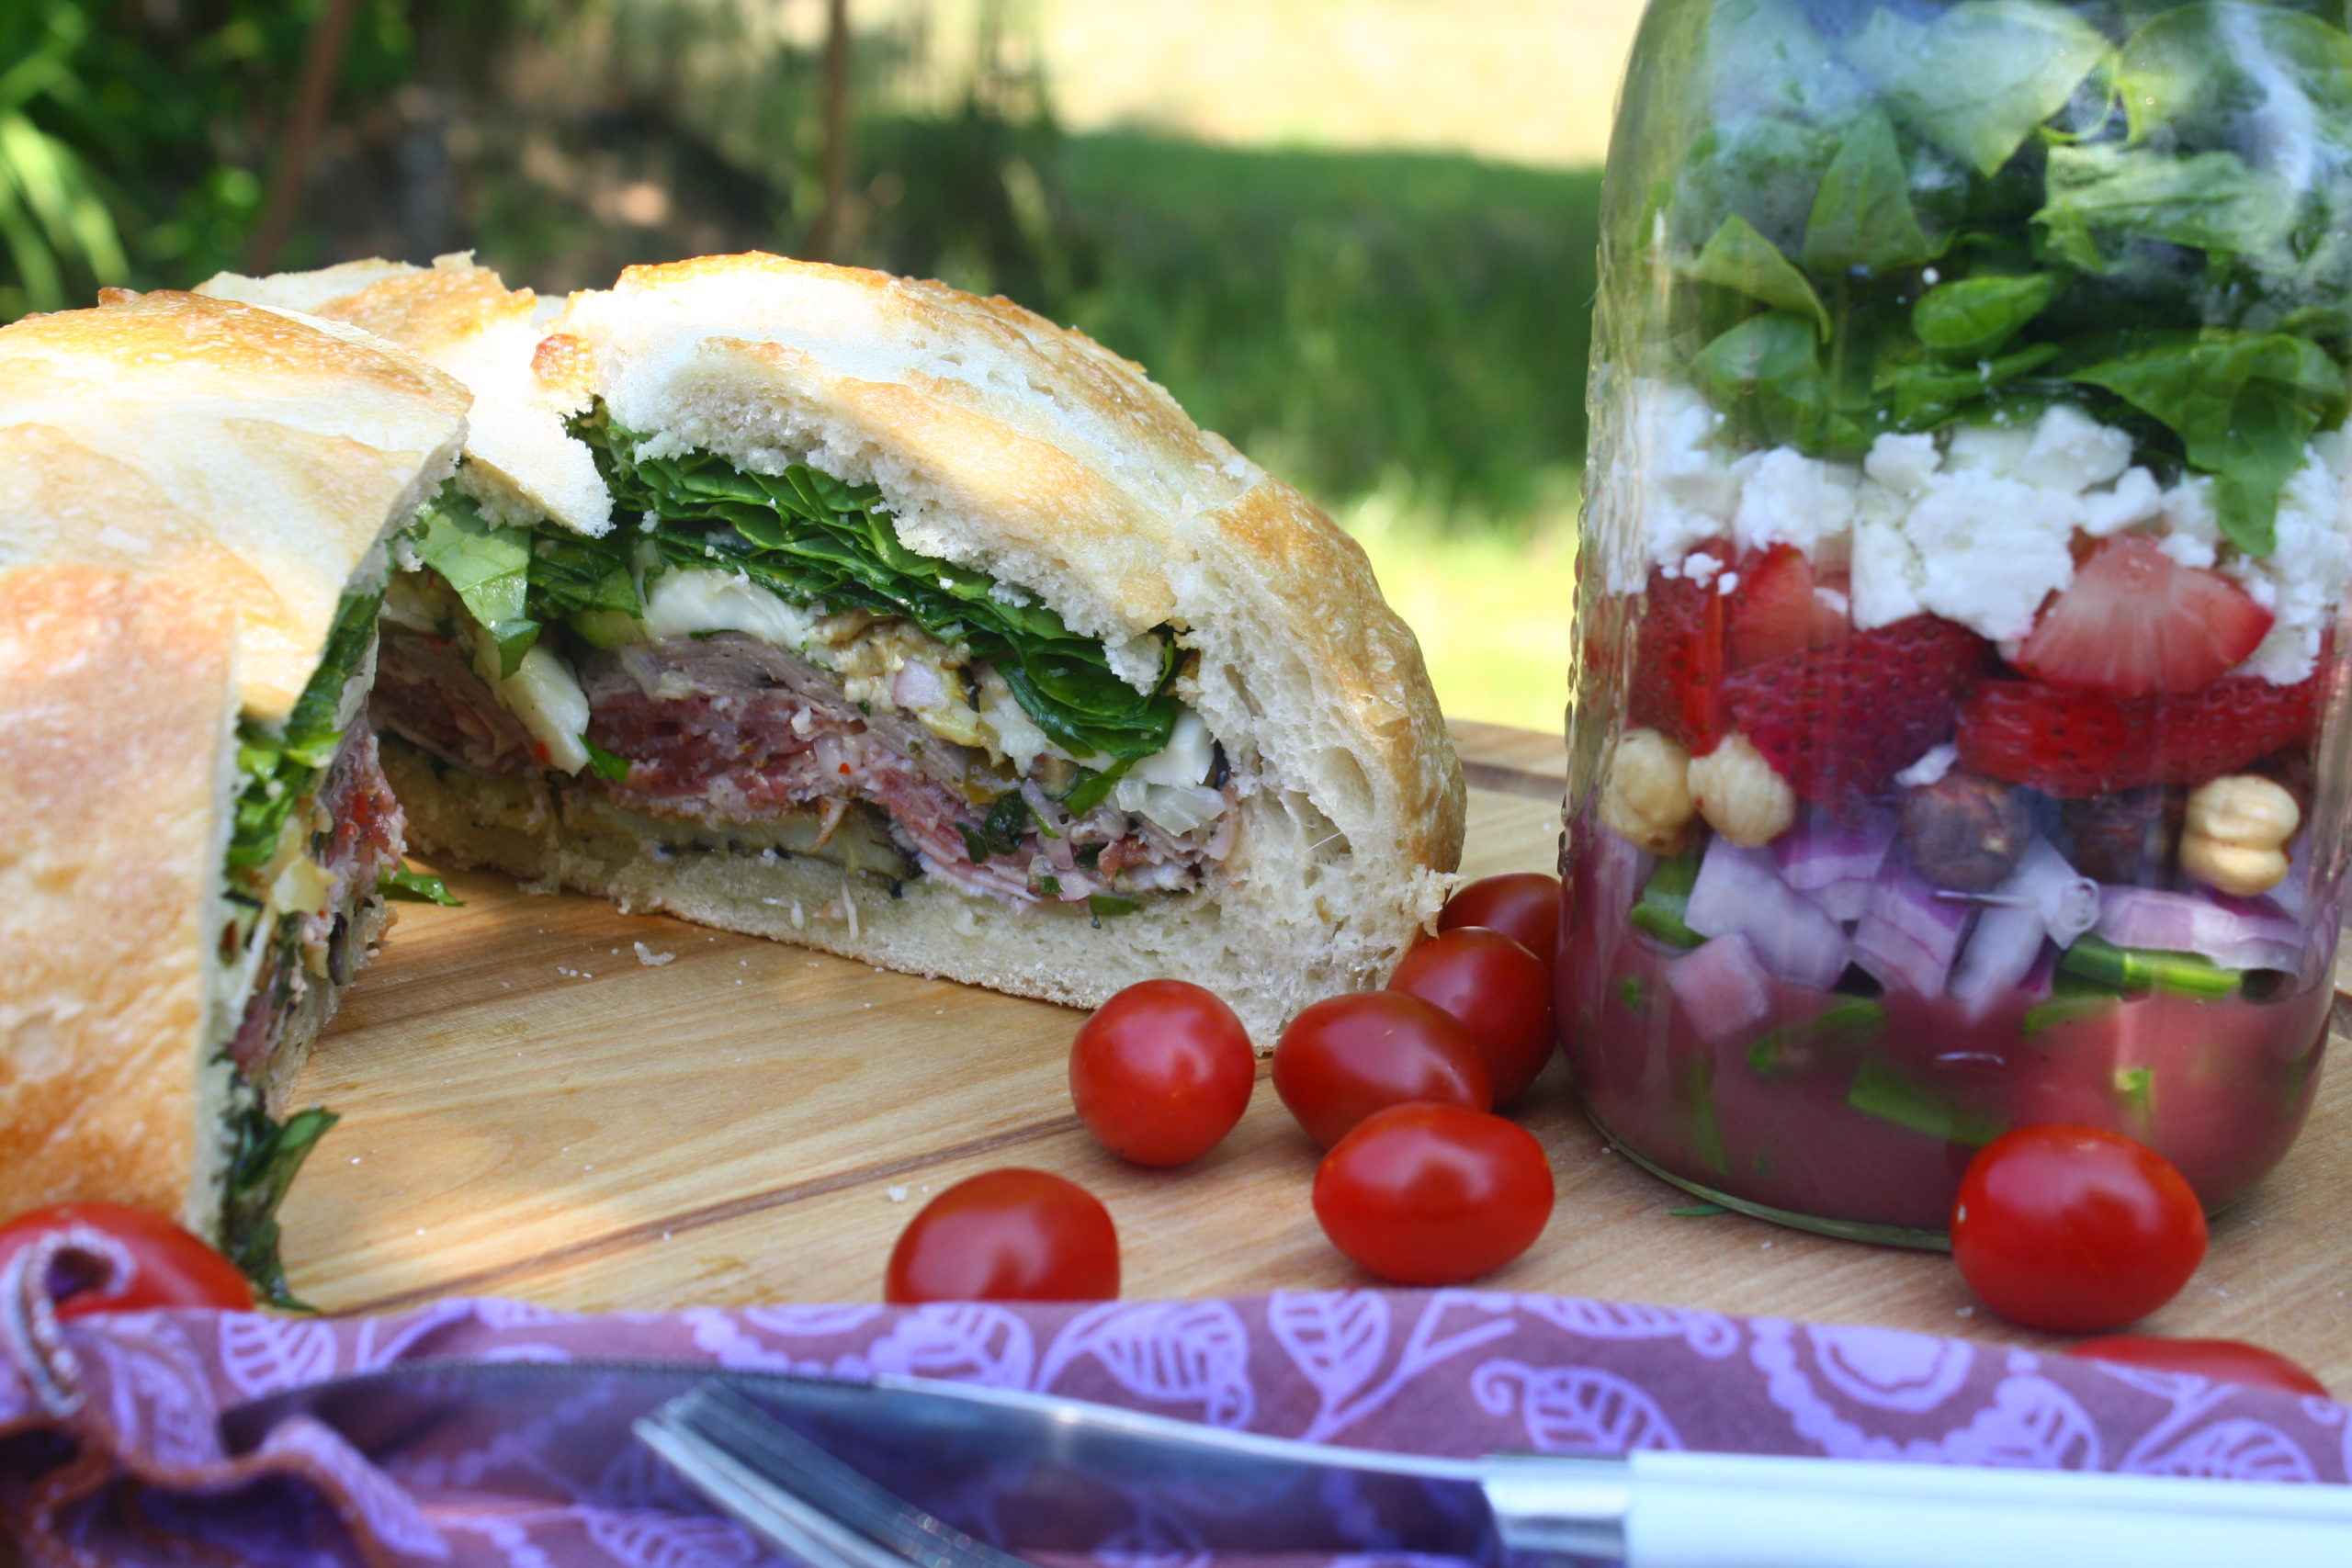
~Salad in a jar~
Get a large mouth mason quart jar and assemble a salad in it in this order; dressing on the bottom lettuce on the top with the details in the middle. If the lettuce mix touches the dressing it gets all wilty and gross, so dressing in first, then use a hearty veggie like shredded cabbage, carrots or peapods next. Layer from there with bite sized yummies like celery, cucumber, nuts, cheese, cherry tomatoes, apple chunks tossed in lemon juice, black olives, berries and sprouts. (avocados don’t work to well in this mix) Think color and flavors. Then, when you are ready, just dump your salad out of the jar on a plate and voila! A perfectly portable salad.

Use your imagination on salad in a jar but here are a few examples to get you going:
-One of my favorite salad combinations: in this order in the jar, raspberry vinaigrette, peapods, shredded carrots, chopped hazelnuts, strawberries, finely diced red onions, feta cheese and spinach on top.
-A Caesar salad jar would go together something like this; Caesar salad dressing, shredded carrots, diced celery, chunks of grilled chicken breast, or salad shrimp, green onion, parmesan cheese, and top off with romaine. (Skip the croutons or bring them along in a separate baggie. They get all mushy in the jar.)
-Cobb salad in the jar; Red wine vinaigrette, celery, red cabbage, fresh corn kernels, red bell pepper, red onion, boiled eggs, bacon bits, chopped ham, grilled chicken breast and romaine. If you want avocado, bring a whole one and cut it up on the salad right before you eat it.
-And of course we must have Salad Nicoise; lemon vinaigrette, blanched green beans, boiled red potatoes, nicoise olives or any black olive, red onion, tablespoon of capers, hard boiled eggs, canned tuna and salad mix to top it all off. Easy squeezy.
More picnic options
– Caprese salad skewers; on bamboo skewers thread washed cherry tomatoes, marinated mozzarella balls and basil leaves. So good you’ll wonder why you haven’t done it before!
-Lightly steam a bunch of veggies like asparagus, green beans and carrot sticks and serve with your favorite dip. Or puréed jarred roasted red peppers with feta, marjoram or oregano and parsley, olive oil and garlic for the dip. Nom nom
-Try fresh skewers. Grill or cook chicken breast, tofu or a nice steak then cut into bite sized pieces. Skewer on bamboo skewers with fresh cherry tomatoes, pineapple and cucumbers. Serve with ranch or blue cheese dressing.
-Banh Mi sandwiches made easy! Just slice open a good baguette and fill it with chopped or shredded cooked chicken or pork tossed with fish sauce, chili, sugar, lime, garlic, scallions and basil. Layer on spinach and drizzle it with olive oil before you serve it.
-Make an antipasti loaf. Get a round loaf of sourdough bread, cut off the top and scoop out most of the insides and give to the birds. Layer roughly in this order, assorted coldcuts like ham, salami, roast beef, thinly sliced fresh mozzarella, little olive oil, jarred roasted red peppers, steamed long strips of zucchini, little olive oil, red wine vinegar and dried Italian herbs, little garlic powder or sautéed chopped garlic, red onions sliced thin more mozzarella and fresh arugula. Make sure and fill to the top. Put the lid on, wrap tightly in plastic wrap and set in the fridge for 1-24 hours. Slice like a pie at the picnic and serve with fresh cherry tomatoes. (Super super delicious, fun to make and the crowd goes wild!)
-Bake your favorite brownie or cheesecake in the small one cup jars. After they are cool, top with a berry jam and fresh berries and put the lid on. Portable heaven.
So now that you are armed with all these abundant ideas, get out there and enjoy the great outdoors with fun food and family time!
by Guest | Jul 19, 2016 | Eat Well, Recipes
By Dana Zia, The GoLightly Gourmet
“I’ve tried it on, like, twenty Oompa-Loompas and each one ended up as a blueberry!” –Willy Wonka
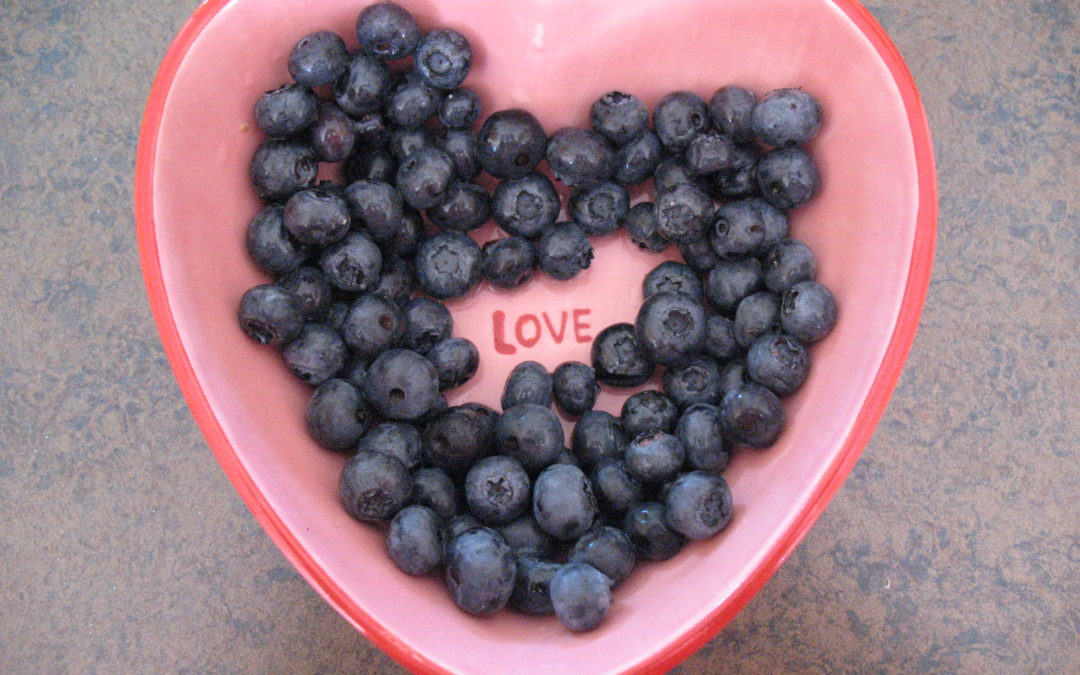
It’s that time of the year again! The berries are starting to show up in the markets with all their joyful color. I love all the berries but what is it about blueberries that is so alluring and charming? I just look at a pint of those lovely blue beauties and I smile. But this little berry is nothing to laugh about because it is not only filled with flavor but is a nutritional GIANT!
You name it they got it. Vitamin C? Yup and not only do they have more Vitamin C than most fruit but they also have a compound in them from the blue color called, anthocyanins, that actually enhance the performance of the Vitamin C. Blueberries are also one of the most celebrated antioxidants ever found by nutritional lab rats. Some of their other attributes are that they have been shown to help keep your heart healthy, fight off Alzheimer’s and dementia, keep your colon and digestive tract healthy, help stave off macular degeneration, protect against ovarian cancer and make you smile when you eat them. They are as healthy for you as a good belly laugh!
Choose your blueberries by their vibrant color and tight skin. Shake the container and make sure the berries move freely to ensure there isn’t any mold or mildew hiding in there. It’s best to store them in the fridge until you use them, which should be just as fast as you can. Don’t wash them until you are just about to freeze them or eat them, as washing takes off their powdery bloom that protects them from mold and the outside world.
One of the wonderful things about blueberries is they freeze well so you can save some of this summer nutrition for all through the year. Freeze them in a single layer on a baking sheet then vacuum seal them for the best results. You can also store them in zip-lock baggies but they will form ice crystals on them faster. I’ve been known to wash the frozen berries in cold water to melt the ice crystals and use them anyway. They taste just fine!
This recipe is as delicious as it is fun for your eyes. It highlights the blueberry in a delightful, savory way opposed to the sweet pancake or muffin way. It sounds like a lot of steps, but is actually quite easy; don’t let the recipe daunt you. If you make up your blueberry vinegar and vinaigrette the day before, it will taste better and the recipe comes together easy. This dish is best eaten outside in the summer evening light, marveling at life and blueberries.

Summer Blueberry Salad with Provincial Chicken
Make this the day before.
Blueberry Vinegar
1 cup of fresh blueberries
¾ cup of white wine vinegar
2 tablespoons of sugar
Pour the blueberries in a sauce pan and squish them up with a potato masher. Add the rest of the ingredients to the pan and bring to a boil on medium heat. Cover and reduce the heat to simmer gently for 10 minutes or so till the whole mix turns a brilliant purple. Let stand for at least 4 hours to marry the flavors then use it in everything you can. This also makes a merry gift.
Blueberry Vinaigrette
1/2 cup of blueberry vinegar
2 teaspoons of honey, warmed
1 teaspoon of Dijon mustard
1/2 teaspoon of salt
Couple cranks of fresh ground pepper
1/4 cup of olive oil
Add all the ingredients to a jar, and shake it up till well mixed. (Hopefully you have put the lid on before shaking it!)
Provincial Chicken
4–6 boneless skinless chicken breasts
1/2 cup of dry white wine
2 tablespoons of lemon
2 tablespoons of olive oil
1 tablespoons of Dijon mustard
3 teaspoons of herbs de Provence spice
OR 1 tablespoon each of fresh chopped sage, rosemary and thyme
2 – 4 cloves of garlic pressed
1/2 teaspoon of salt
3-4 cranks of fresh cracked pepper
Whiz all the ingredients up in the blender or whip by hand in a bowl till you are happy with it. Marinade the chicken in a plastic zip lock bag or bowl for about half hour before cooking. You can either grill or bake the chicken, depending on your preference. If you bake it, pour all the marinade in the dish with the chicken. Bake for 20-25 minutes at 425 degrees or till the chicken is opaque all the way through with no pink inside. If grilling, discard the marinade and grill on a medium hot grill till for 25-30 minutes till turning once, till done. Sprinkle a little of the herbs de Provence on the chicken breasts, when cooked, for eye candy.
Now, let’s put it all together!

Summer Blueberry Salad with Provincial Chicken
6 to 8 cup of your favorite salad greens
1 cup of fresh blueberries
A cup or so of cherry tomatoes, cut in half
1/2 cup of goat or sheep feta, crumbled
1/2 cup of finely diced red onion
4 tablespoons of toasted sliced almonds
4 Provincial chicken breasts, cold or hot
Blueberry vinaigrette
Separate your greens between 4 beautiful individual salad bowls. Feed your creative muse by arranging the blueberries, tomatoes, onion, almonds and feta artfully in each bowl. Slice the chicken breast up and place one on top of each bowl of salad, in a fan shape, or just plop the whole breast on there or you can slice it and fan it out to be fancy. Drizzle the blueberry vinaigrette on top and serve to your drooling family and friends. Eat and be merry!
by Guest | Jul 10, 2016 | Eat Well
By Dana Zia, The Golightly Gourmet
The turnip is one of the veggies that I could never remember what it looked like. I knew it was white and that was about it. Then the CSA box of veggies that I get weekly made sure that I learned all about turnips because I always had them. After I used up all the produce from the box each week, there was always a bag full of these large white orbs bouncing around in my produce drawer demanding I figure them out.
Now I know more about turnips and I really have discovered that I enjoy them. In case you haven’t been in the CSA turnip immersion program, turnips are round white root veggies that are in the noble Brassica family along with the likes of kale, broccoli, mustard and cabbage. There are many varieties, as you can imagine, but the two simplest categories are spring and fall turnips.
The fall variety is the classic cream colored turnip with thick skin, hearty flesh and light purple shading on the top and bottom. They are excellent for roasting, scalloping, mashing and soups. The spring varieties, also called salad turnips, are usually all white, thin skinned and have a delicate flesh that is excellent for salads, pickling and eating raw. They are also good stir fried and lightly roasted.
It was interesting to ask around and find out that not many people are into turnips. These vegetables have been domesticated for a very long time and started as a crop in India in the 15 century BC. The Romans were fond of them and spread them liberally across Europe where they are still popular today for both human and livestock consumption. So why do they have such a bad rap?
Well, come to find out they contain a bitter compound in them that releases a small amount of cyanide. It isn’t enough to hurt you on any level but certain folks can detect it if they have inherited two copies of the “sensitive” gene that dates back to the Neanderthal. This ancient gene was to keep the caveman from eating poisonous food (due to their wee brain) and people possessing a pair of them will find the root bitter and unpalatable. This has given the turnip its unfair and undesirable reputation.
If you haven’t given this root a try I recommend starting right now with the sweet spring salad turnips called Hakurei” or “Tokyo” turnips that are available now. When using them think “radishes” because they are very much like that spunky root but without the kick. Grate them into salads and serve them raw with a touch of salt on veggie platters. They are also excellent tossed in olive oil, salt and pepper and roasted in a hot oven, 400 degrees, till golden turning once, about 15 minutes.
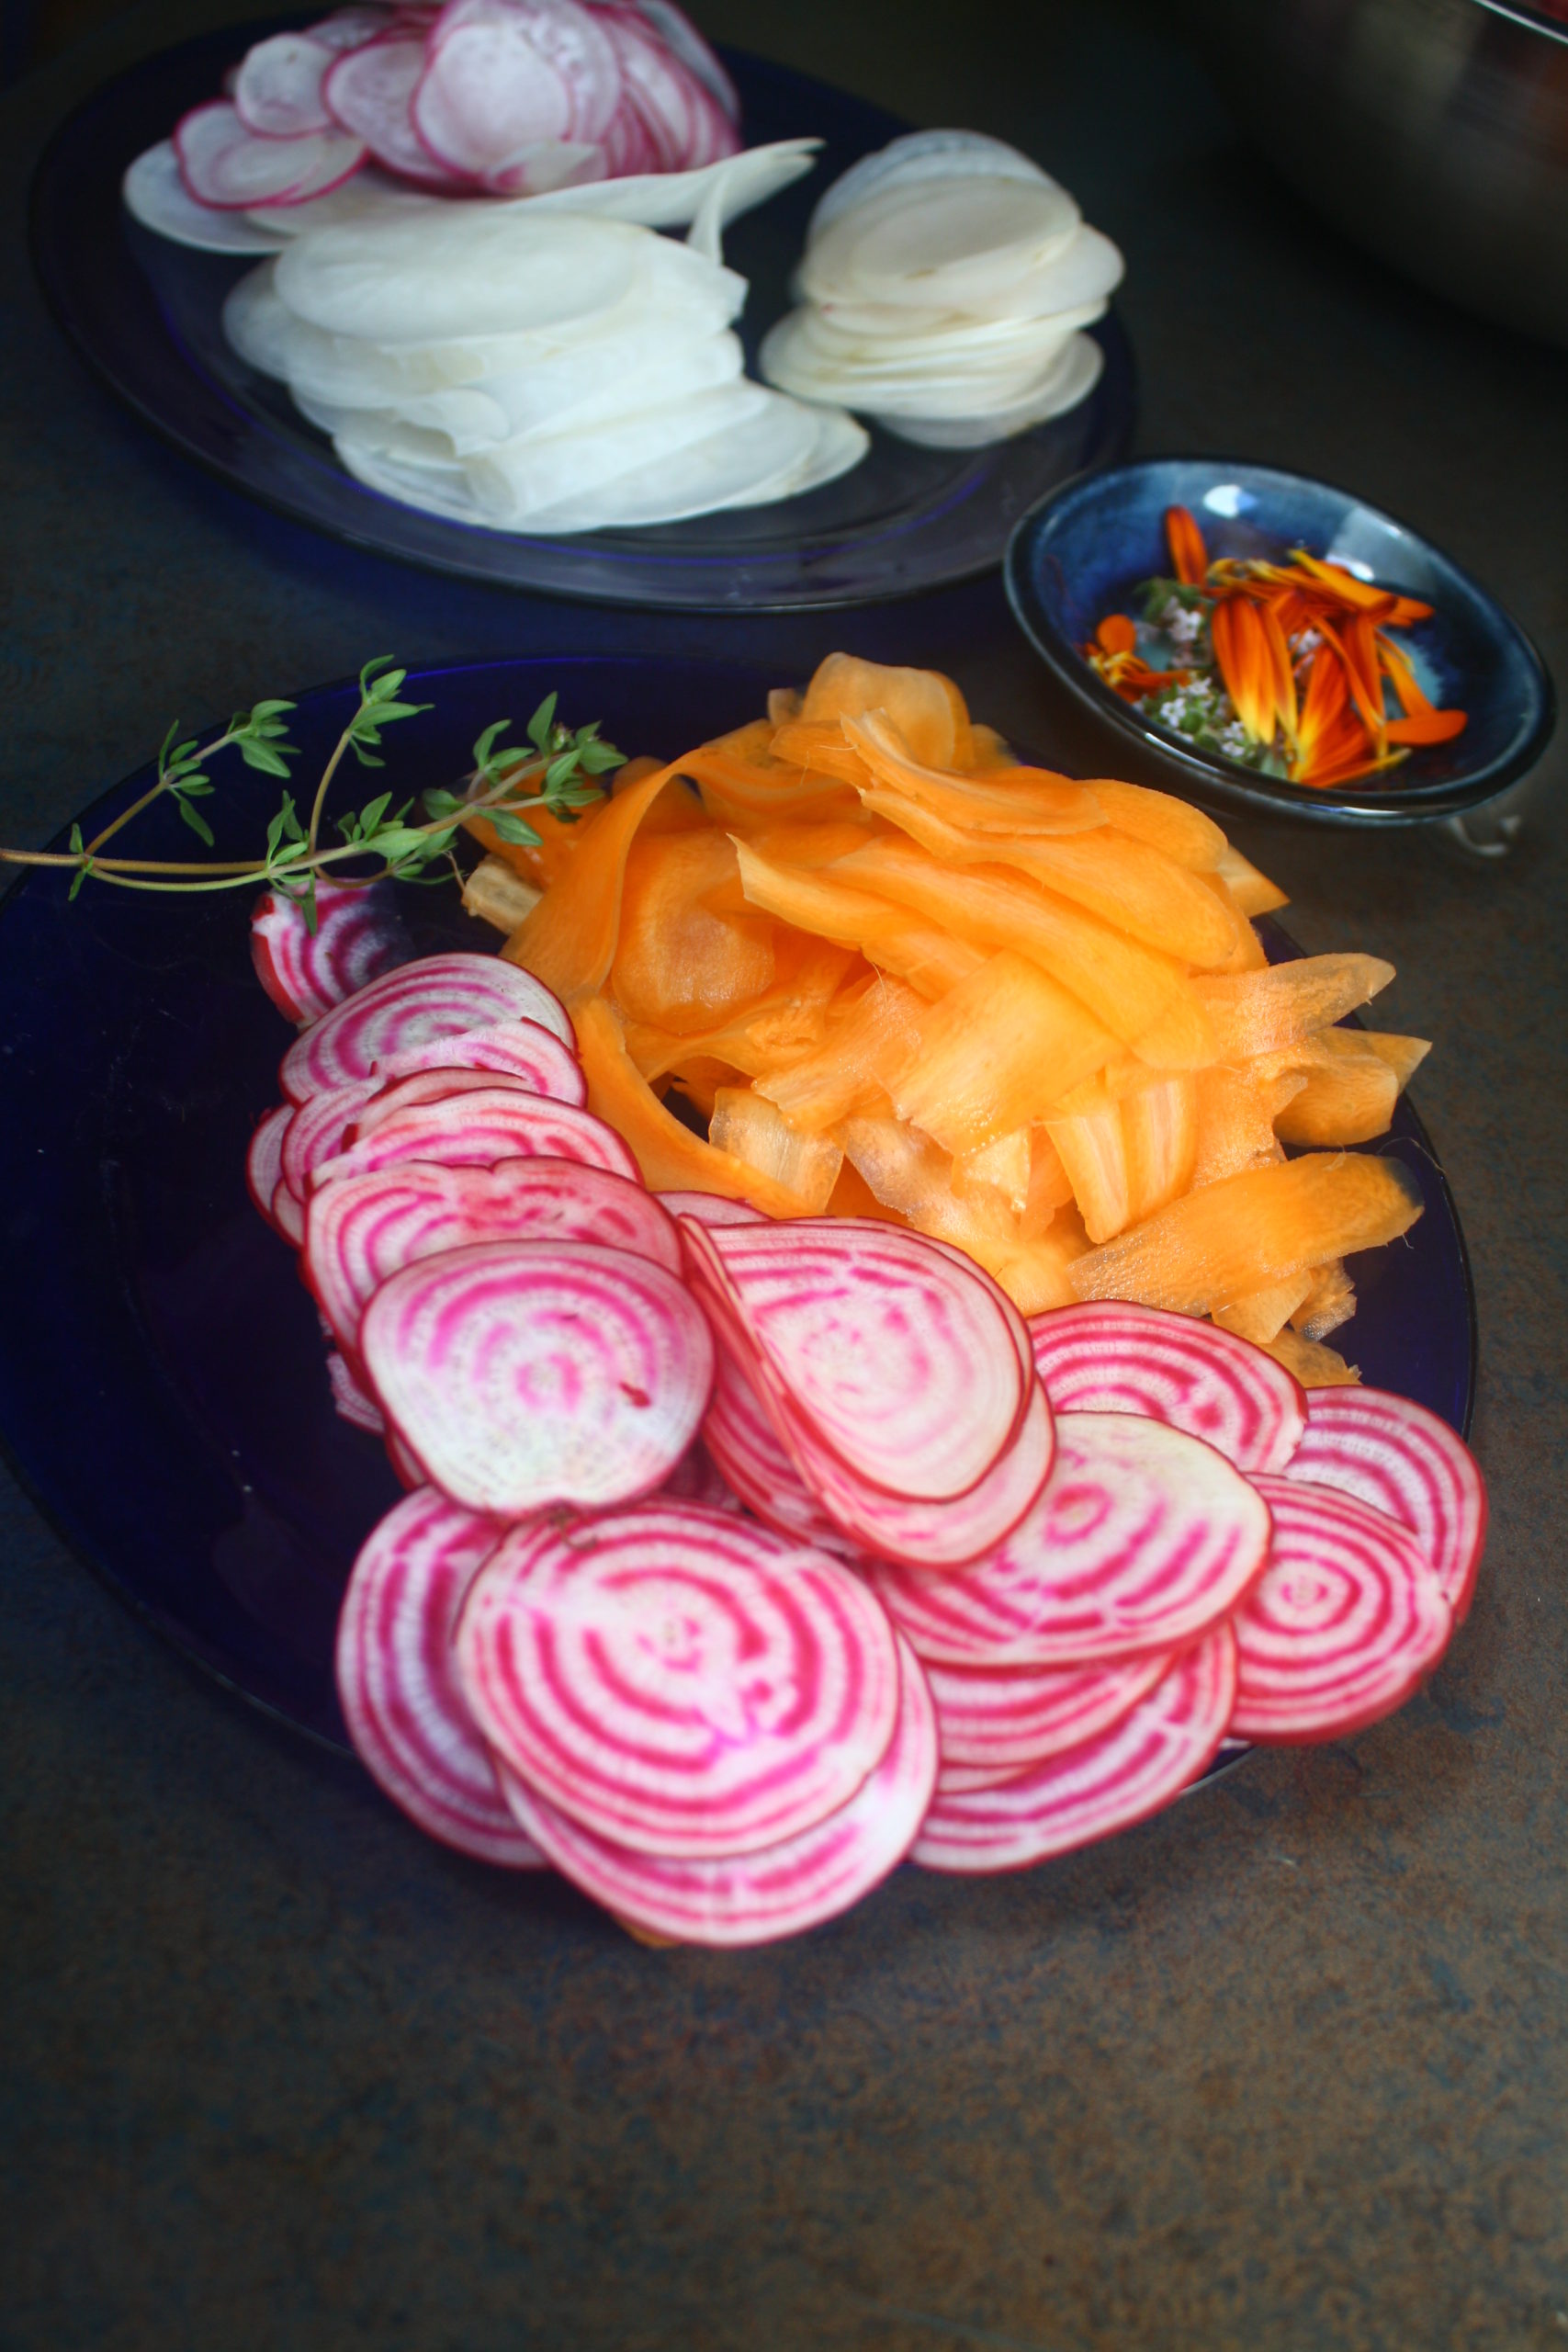
Farmer Ginger of Revolution Gardens recommends lightly sautéing them with sugar snaps peas with grated ginger and organic soy sauce. She also recommends using them as a refreshing crunch like in tacos and sandwiches. Here is a fun salad recipe that highlights much of our beautiful local produce that will be tempting us at the farmers markets throughout Tillamook County in Manzanita, Tillamook and Pacific City opening the weekend of June 10th, or at Neskowin’s Farmers Market which is now open on Saturdays. You can use raw beets for this recipe if you like but I like to cook my beets by boiling them till just tender and use them in salads. They are easier on the digestion that way. Hopefully I have inspired you to give an old vegetable a chance…or a second chance.

Shaved spring root salad with citrus dressing
This dressing calls for hazelnut oil which adds a wonderful flavor to anything it is added to. I recommend you get some if you have never played with it. It is amazing added to baked goods! If you do not have it, olive oil can be subbed for it. Serves four.
The citrus dressing
2 TBLS of hazelnuts
1/4 cup of fresh orange juice
1 TBLS of fresh lemon juice
2 TBLS of olive oil
1 TBLS of hazelnut oil (Can replace this with olive oil)
1 tsp of warmed honey
1 TBLS of a fresh herb (I used thyme)
Sea salt and pepper to taste
The salad
2 medium red beets or different colors, boiled till just tender
1 medium salad turnip
4-5 small carrots
2-3 radishes
Spring greens to layer the shaved roots on
2 stocks of spring green onions, sliced thin
2 TBLS of hazelnuts roughly chopped
Feta cheese
Fresh herbs and flower petals for garnish (optional)
Salad time! Start by making the salad dressing by adding all the dressing ingredients to a blender and giving it a whirl till well blended. Season with salt and pepper to taste then set aside in the fridge till ready to use.
by Guest | Jul 10, 2016 | Eat Well
By Dana Zia, Golightly Gourmet
“Fresh herbs can change everything. You can have pasta every night and if you change the herbs in it and you have a whole new dish.” Alice Waters
Discovering cooking with fresh herbs was definitely a culinary epiphany for me. I’ll never forget it. Angels sang, trumpets heralded on high, my hair curled and my life changed, forever. (Well, maybe my hair was already kinda curly.)
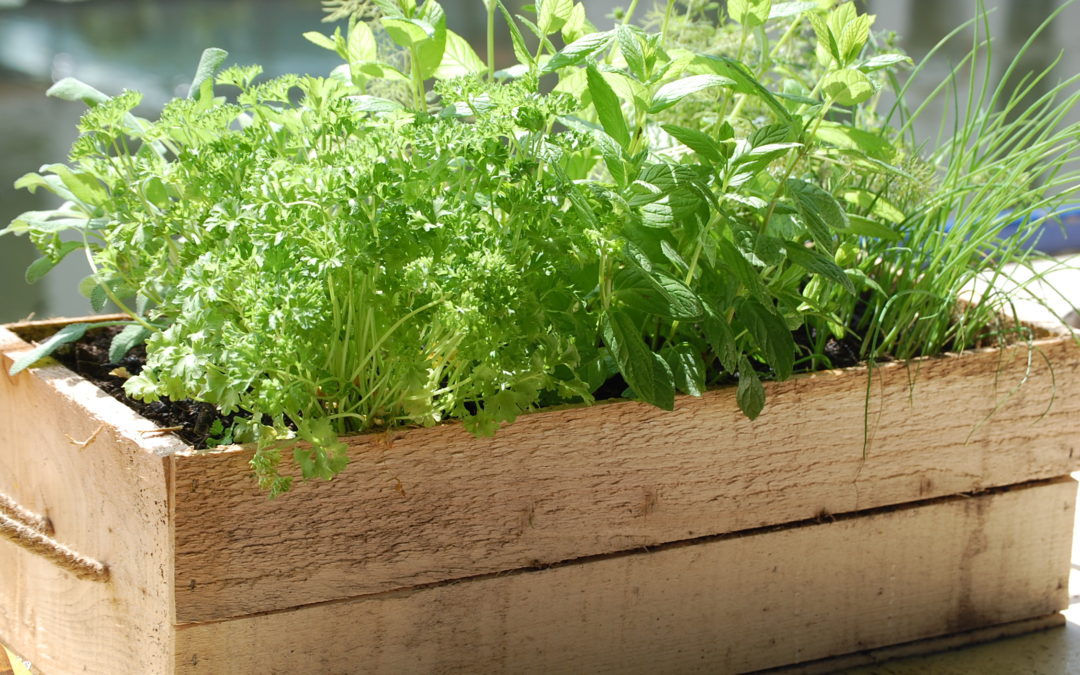
I knew in that moment that I had to grow my own herbs. A large herb garden is now a prominent part of my life. It is situated conveniently right outside the door so I can dash out to cut herbs, come rain or shine. My herb garden is well stocked with thyme, oregano, mint, tarragon, sage, lavender, chives, rosemary and the ubiquitous parsley. In the summer months, I add the annual herbs; dill, cilantro and with great effort and a green house, basil. Yes, I guess you could call me an herb junkie.
If you haven’t got an herb garden yet, I highly recommend it. They are easy to grow in our climate and a large amount of them are perennials that come back every year. Most herbs don’t take up that much space either. (Except for rosemary, which should be planted as a shrub around here!) You can even grow some in your window sills or on your deck in small pots. Believe me, it’s worth it. You will delight in this addition to your culinary world. It is amazing how much flavor fresh herbs add to anything and, get this, there are minimal calories and lots of medicinal benefits to them.
There is one drawback however; most herbs go away with the sun. I’ve tried drying the herbs and have found that the flavor is, well, like dried herbs. It just doesn’t have the impact on the senses that I desire. So after many experiments, I have discovered a wonderful way to preserve that lovely fresh herb flavor well into the dark and stormy months. Make herbal ice cubes! They are easy to make and the joy you will get out of them in the months to come is well worth the effort.
First off, harvest, buy or ask the neighbor for fresh herbs that you want to freeze and give them a rinse. Pluck off all the leaves and discard the stems then pulse the herbs in a food processor or blender with enough liquid like broth, olive oil or water to get your desired consistency. Use just enough liquid to blend the herbs together well.
Plop spoonfuls into some cleaned ice cube trays or a mini muffin pan and freeze. I like to place little leaves or flowers from the herbs in the bottom of the ice cubes before I add the herb mix. When the herbal ice cubes come out of the tray, they are so beautiful. Have fun and experiment, it’s like a tasty art project you get to enjoy all winter!
When they have frozen solid, about 12 hours, pop them out and store them in a zip lock bag in the freezer. Then do another batch to ensure you’ll have plenty. I have used these little nuggets for up to two years old and they were perfectly fine. I have also pureed garlic in the food processor with a bit of water or oil and frozen the puree in ice cubes. Works great!
When you use the herbal ice cubes, just take one (or two) out and toss in whatever you are cooking, they are amazing in soups, pasta and sauces. It will melt down fast and voila! You have saved some sweet summer for your winter dishes.
This recipe that I am sharing today will get your taste buds tingling and into herb freezing. Feel free to add any root vegetables that you find in your produce drawer. It is a great way to use up the old veggies and move on to the summer produce. It is also great with any new root veggies you can pick up at the farmers market or the store.
Herbed Roasted Roots
This dish rocks the free world. It is easy, delicious and nutritious. I do not peel any of the roots, so as to retain all those lovely minerals. Use any combination of herbs you enjoy. I usually use rosemary, sage, parsley and thyme. ♪
3 med beets
3 med potatoes
2 med turnips or parsnips
4 or 5 med carrots
1 large onion
2 -3 cloves of garlic
2 – 3 tablespoon of fresh herbs or
2 melted herb cubes
1 – 2 tablespoons of olive oil
Salt and pepper to taste
Preheat the oven to 400 degrees and get out a large baking pan. Lightly oil the bottom of the pan. Scrub all the roots real well then cut into sizes that are similar so they will cook evenly. Lay them out in the baking dish. Chop up the onion, mince the garlic and herbs then sprinkle over the roots. Drizzle the olive oil over the lovely mess and toss to coat evenly. Bake for about 25 – 35 minutes or until the biggest potato is easily pierced with a fork, stirring once or twice. The house will start to fill with the best aroma ever and that’s when you know it’s getting close to done. Take out and season with the salt and pepper. Serve hot and Enjoy!
by Guest | Jun 23, 2016 | Eat Well, Recipes
Types of Yogurt
Traditional yogurt has a tart taste and smooth texture. It can be thickened with milk solids, gelatin, agar, guar gum
or starches.
Greek style yogurt has been strained to separate out the liquid whey. This makes it thicker and concentrates theprotein. It also reduces the calcium, sodium and sugars.
Plain yogurt is especially tart because it has no added fruit or sugar.
Flavored yogurts may contain fruit or other natural or artificial flavorings, sugars or artificial sweeteners.
Non-dairy yogurt can be made from soy, coconut or almond milk.
Yogurt provides calcium, protein and healthful (probiotic) bacteria.
Yogurt may be easier to digest for people with lactose intolerance.
�
Store Well; Waste Less
Keep yogurt in the refrigerator.
Cover tightly to keep it from drying out, spoiling, or taking on the flavors of other foods in the refrigerator.
� If stored well (refrigerated and covered), yogurt is safe to eat after
the ‘use by’ date but the flavor may be more tart and the liquid may
have separated out. (It will need to be stirred.) Discard the entire
container if any mold has appeared.
� Freezing yogurt is safe but the texture will not be the same after
thawing.
$hop and $ave
Store brands can be less expensive than national brands.
� Buying yogurt in larger containers instead of single serving containers can save you money. Check the cost per ounce on the grocery shelf price tag.
� Check the ‘best by’ or ‘use by’ date on the package and choose the longest time for use.
� Greek yogurt may cost more than regular yogurt.
USING YOGURT — Recipes

Quick Fix
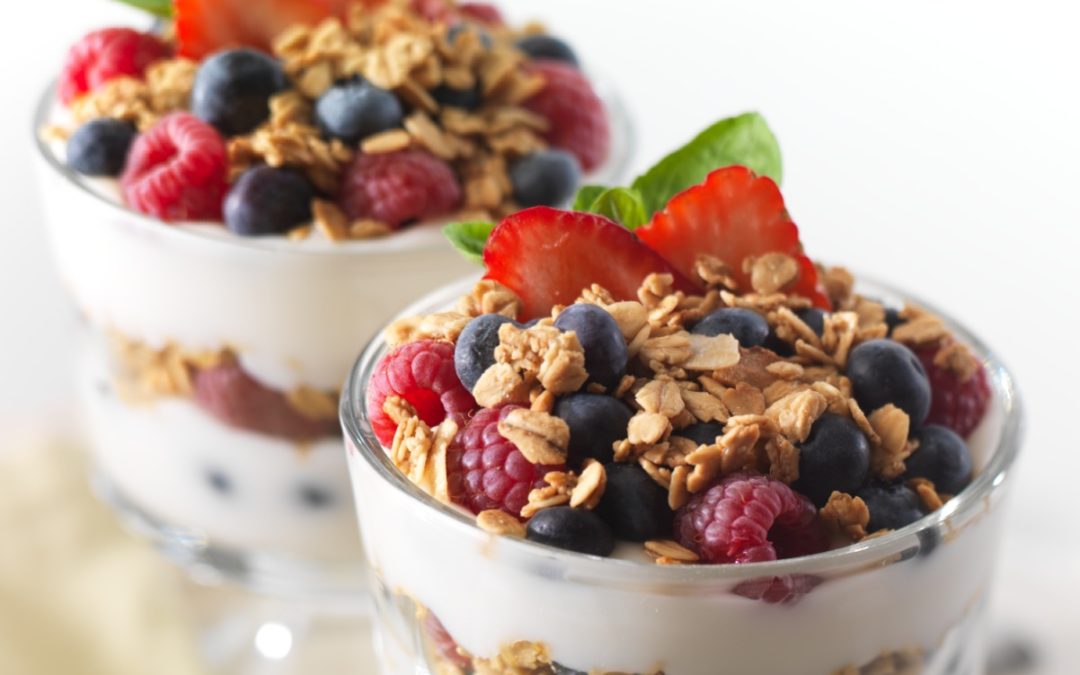
� Use yogurt in smoothies and frozen fruit yogurt.
� Substitute for mayonnaise and sour cream in salad dressing or dips.
� Add to fresh or frozen fruit and granola.
� Substitute for buttermilk in baked goods.
� Top waffles or pancakes with yogurt and fruit.
When kids help make healthy food, they are more likely to try it. Show kids how to:
� measure yogurt or other ingredients.
� mix or shake the ingredients.
� use a rubber scraper to get peanut butter out of a cup.
� wash and slice fruit.
Peanut Butter Yogurt Dip
Ingredients:
½ cup nonfat plain yogurt
¼ cup peanut butter
¾ teaspoon cinnamon (optional)
Directions:
1. In a small bowl, mix together yogurt and
peanut butter. Add cinnamon, if desired.
2. Serve with slices of fruit or vegetables.
3. Refrigerate leftovers within two hours.
Makes: ¾ cup Prep time: 5 minutes
Drinkable Yogurt
Ingredients:
½ cup low fat plain yogurt
½ cup 100% fruit juice
Directions:
1. Add yogurt and juice to a clean jar or other container with a lid. Close lid and shake.
2. Serve cold.
3. Refrigerate leftovers within 2 hours.
Makes: 1 cup Prep time: 5 minutes
Yogurt Fruit Dip
Ingredients:
1 cup nonfat plain yogurt
1 teaspoon vanilla extract
½ teaspoon cinnamon
1 teaspoon brown sugar
Directions:
1. In a bowl, combine yogurt, vanilla, cinnamon and brown sugar. Mix well.
2. Serve with sliced apples or other fruit.
3. Refrigerate leftovers within 2 hours.
Makes: 1 cup Prep time: 5 minutes
Go to FoodHero.org for easy, tasty recipes using yogurt
This material was funded by USDA’s Supplemental Nutrition Assistance Program (SNAP). SNAP provides nutrition assistance to people with low income. SNAP can help you buy nutritious foods for a better diet. To find out more, contact Oregon SafeNet at 211.
USDA is an equal opportunity provider and employer.
©2016 Oregon State University Extension Service offers educational programs, activities, and materials without discrimination based on age, color, disability, gender identity or expression, genetic information, marital status, national origin, race, religion,
sex, sexual orientation, or veteran’s status. Oregon State University Extension Service is an Equal Opportunity Employer.